


How to Use Push-Up Bars Correctly: A Beginner's Guide
Push-ups remain one of the most effective bodyweight exercises for building upper body strength, but traditional floor push-ups can strain your wrists and limit your range of motion. Push-up bars offer an elegant solution to these problems while amplifying the benefits of this classic exercise.
Push-up bars are simple fitness tools that elevate your hands during push-ups, creating a deeper range of motion and reducing wrist strain. Popular throughout the UK fitness community, these affordable accessories have transformed how people approach home workouts. Whether you're recovering from a wrist injury or simply want to maximise your push-up potential, understanding proper push-up bar technique can revolutionise your training routine.
This comprehensive guide will walk you through everything you need to know about using push-up bars correctly, from selecting the right equipment to mastering advanced variations. By the end, you'll have the knowledge and confidence to incorporate these versatile tools into your fitness journey safely and effectively.
Choosing the Right Push-Up Bars
The UK fitness market offers various push-up bar options, each designed to meet different needs and budgets. Understanding these differences will help you make an informed decision.
Types of Push-Up Bars
Fixed Push-Up Bars feature a stable, non-rotating design that provides consistent support throughout your workout. These bars typically have foam or rubber grips and are ideal for beginners who want reliable stability during their exercises.
Rotating Push-Up Bars incorporate a swivel mechanism that allows natural wrist movement during the exercise. This design reduces joint stress and can accommodate different hand positions, making them popular among experienced users.
Ergonomic Push-Up Bars feature angled or curved handles designed to match the natural position of your wrists and hands. These specialised bars often cost more but provide superior comfort for extended training sessions.
Key Features to Consider
When shopping for push-up bars in the UK, evaluate the grip quality first. Look for non-slip handles made from durable materials like foam or rubber that won't become slippery during intense workouts.
Base stability matters enormously for safety and performance. Quality push-up bars feature wide, non-slip bases that remain secure on various floor surfaces, from carpet to hardwood.
Weight capacity should align with your body weight plus any additional resistance you might add later. Most reputable brands clearly state their weight limits, typically ranging from 100kg to 150kg.
2x Push Up Bars represent the standard configuration for most exercises, providing the foundation for proper push-up bar training. This setup allows for balanced upper body development and forms the basis for all the techniques covered in this guide.
Proper Form and Technique
Mastering push-up bar technique requires attention to positioning, movement patterns, and breathing. These fundamentals ensure maximum benefits of push-up bars while minimising injury risk.
Setting Up Your Position
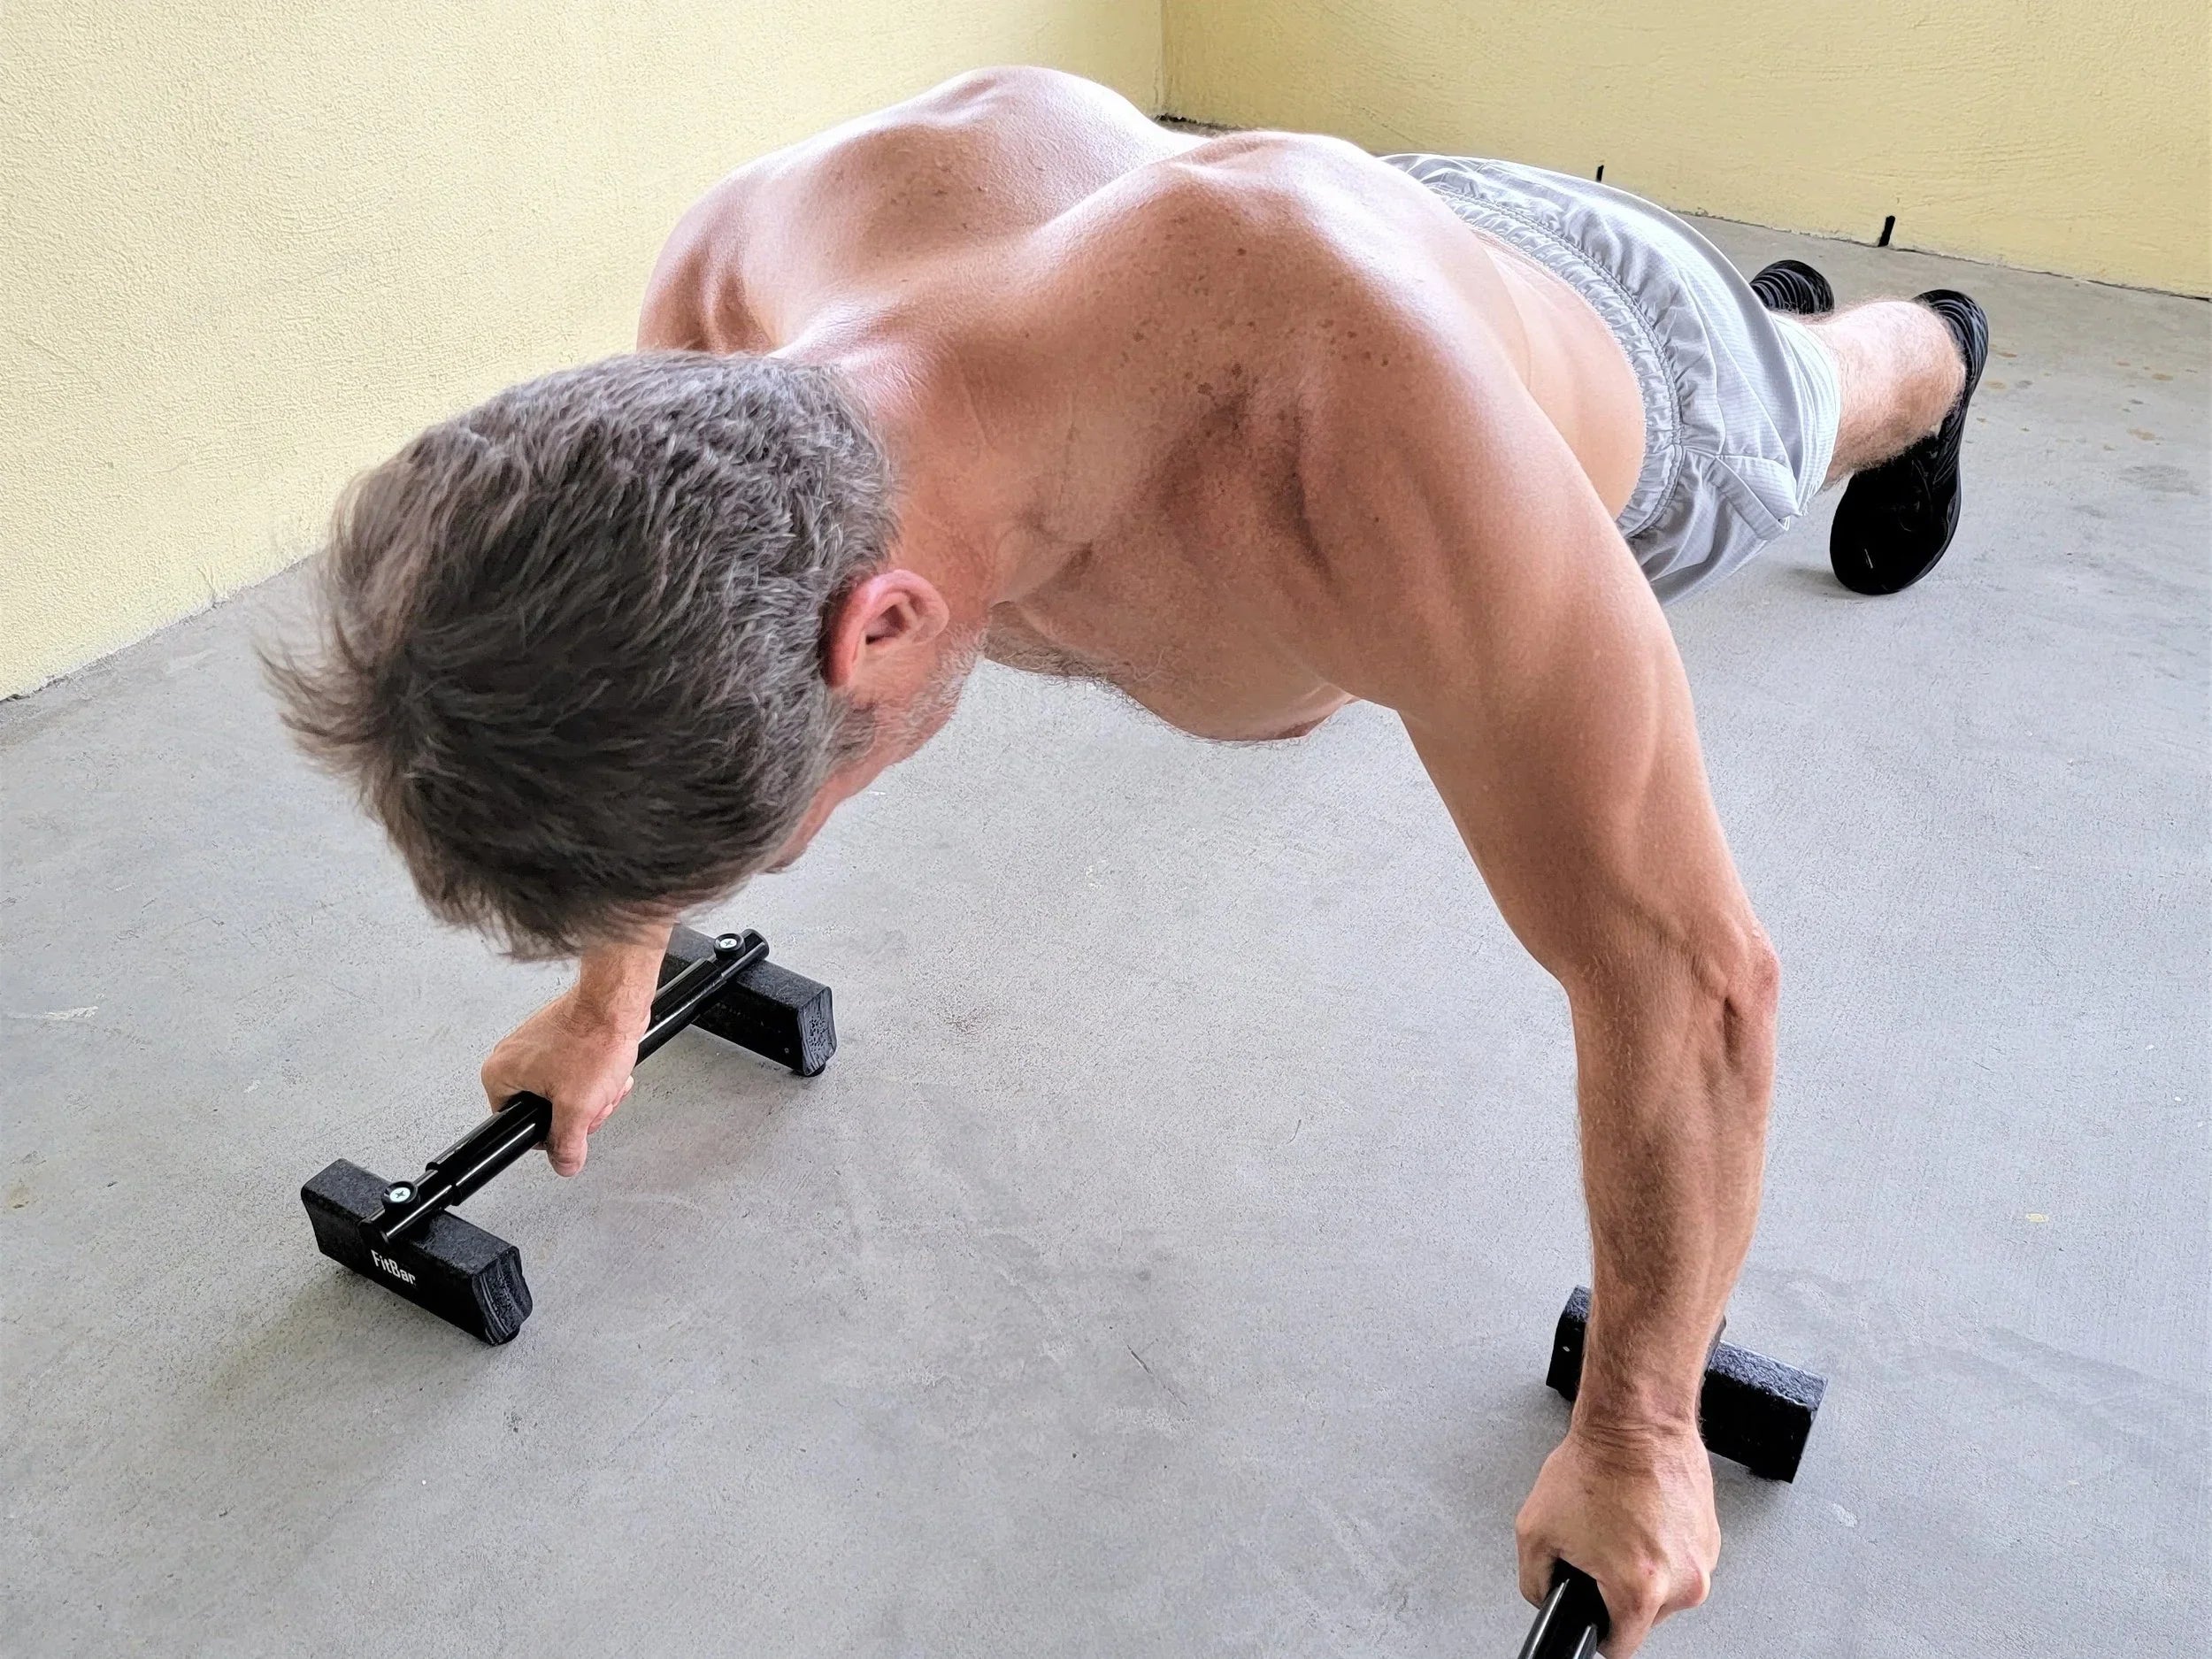
Place your push-up bars shoulder-width apart on a flat, stable surface. The bars should align directly under your shoulders when you assume the starting position. This alignment ensures proper weight distribution and optimal muscle engagement.
Grip the bars firmly with your palms facing down and fingers wrapped securely around the handles. Your wrists should remain straight and neutral throughout the entire movement—one of the primary advantages of using push-up bars over traditional floor push-ups.
Position your feet according to your current fitness level. Beginners can start with feet slightly wider than hip-width for added stability, while advanced users might prefer a narrower stance for increased challenge.
The Movement Pattern
Begin in the high plank position with your body forming a straight line from head to heels. Engage your core muscles to maintain this alignment throughout the exercise.
Lower your body by bending your elbows, allowing them to track at approximately a 45-degree angle from your torso. This angle optimises chest activation while protecting your shoulder joints from excessive stress.
Descend until your chest approaches the level of the push-up bars. The increased range of motion provided by the bars allows for a deeper stretch in your chest muscles compared to traditional push-ups.
Push through your palms to return to the starting position, focusing on a controlled, steady movement. Avoid rushing the upward phase, as the controlled ascent contributes significantly to strength development.
Breathing Technique
Coordinate your breathing with the movement for optimal performance. Inhale during the lowering phase, allowing your ribcage to expand naturally. Exhale forcefully during the pushing phase, which helps stabilise your core and provides additional power.
Maintain steady breathing throughout your set rather than holding your breath, which can increase blood pressure and reduce performance.
Common Mistakes to Avoid
Even with the best pushup bar equipment, poor technique can limit results and increase injury risk. Recognising these common errors helps you maintain proper form from the beginning.
Wrist and Hand Placement Errors
Placing your hands too wide or too narrow disrupts the natural movement pattern and reduces effectiveness. Hands positioned too wide shift emphasis away from the chest toward the shoulders, while hands too close together may cause wrist discomfort.
Gripping the bars too tightly creates unnecessary tension in your forearms and can lead to premature fatigue. Maintain a firm but relaxed grip that allows natural hand positioning.
Body Alignment Issues
Allowing your hips to sag creates an arched back position that places stress on your lower spine. Conversely, raising your hips too high shifts the exercise emphasis toward your shoulders rather than your chest.
Letting your head drop or crane forward disrupts spinal alignment and can cause neck strain. Keep your head in a neutral position, with your ears aligned over your shoulders.
Movement Execution Problems
Bouncing at the bottom of the movement eliminates the muscle-building benefits of the exercise and increases injury risk. Each repetition should include a brief pause at the bottom position to ensure full muscle engagement.
Partial range of motion limits the advantages that push-up bars provide. Take advantage of the increased depth by lowering your chest to bar level on each repetition.
Progression Mistakes
Advancing too quickly to difficult variations before mastering basic technique often leads to form breakdown and potential injury. Build a solid foundation with standard push-up bar exercises before attempting advanced movements.
Neglecting warm-up exercises can leave your muscles unprepared for the demands of push-up bar training. Always include dynamic stretches and light movements before beginning your workout.
Advanced Techniques and Variations
Once you've mastered basic push-up bar technique, these advanced variations can add new challenges and prevent training plateaus.
Single-Arm Push-Up Bar Training
Single-arm push-ups using one bar dramatically increase the strength and stability demands of the exercise. Begin by practicing the movement with your non-working hand on an elevated surface before progressing to full single-arm repetitions.
This variation requires exceptional core strength and shoulder stability. Start with partial range of motion and gradually increase the depth as your strength improves.
Plyometric Push-Up Bar Exercises
Explosive push-ups using push-up bars add a power component to your training. Push forcefully enough to lift your hands off the bars briefly before landing softly and immediately beginning the next repetition.
These exercises require significant upper body strength and should only be attempted after mastering standard push-up bar technique. The increased range of motion from the bars allows for more explosive movement than traditional floor plyometric push-ups.
Combination Movements
Integrate push-up bars into circuit training by combining them with other bodyweight exercises. Mountain climbers performed with hands on push-up bars increase the core challenge while maintaining the wrist-friendly position.
Push-up to T-rotation movements involve performing a standard push-up, then rotating into a side plank position while holding one bar. This combination challenges multiple muscle groups and improves coordination.
Resistance Band Integration
Adding resistance bands to push-up bar exercises increases the challenge throughout the entire range of motion. Anchor the band behind you and loop it over your back, or use bands attached to the bars themselves.
This variation provides accommodating resistance, meaning the exercise becomes more challenging as you push up—matching your strength curve more closely than bodyweight alone.
Maximising Your Push-Up Bar Training
Consistency and progressive overload remain the keys to seeing results from push-up bar training. Start with 2-3 sets of 8-12 repetitions and gradually increase volume as your strength improves.
Track your progress by recording the number of sets, repetitions, and any variations you perform. This documentation helps you identify when to increase difficulty and ensures continuous improvement.
Consider your push-up bar training as part of a balanced fitness routine rather than a complete workout solution. Combine these exercises with pulling movements, lower body training, and cardiovascular exercise for optimal results.
The benefits of push-up bars extend beyond just stronger chest muscles. Regular training improves shoulder stability, core strength, and overall functional upper body power that translates to daily activities and other sports.
Quality equipment makes a significant difference in your training experience and results. Investing in well-constructed push-up bars ensures safety, durability, and optimal performance throughout your fitness journey.
Remember that mastering push-up bar technique takes time and practice. Focus on perfect form with easier variations before progressing to more challenging exercises. This patient approach builds a strong foundation and reduces injury risk while maximising long-term results.