News

News

Home Gym on a Budget: Why Gym Floor Mats Matter

by Saqlain Irshad on Jan 03 2026
Creating a personal workout space at home is a dream for many fitness enthusiasts. It offers the freedom to train whenever you want, wear whatever you like, and skip the commute (and the queues for the bench press). However, the perceived cost often puts people off. The good news is that building a functional home gym doesn't require a lottery win. With smart choices, you can set up an effective training area without breaking the bank. While buying weights and cardio machines usually takes priority, there is one unsung hero of the home gym that is often overlooked until it's too late: the flooring. You might think an old rug or the bare carpet will suffice, but investing in proper budget home gym flooring is foundational—literally and figuratively. Let's explore why affordable gym mats are a non-negotiable part of your setup and how to choose the right ones for your space. Understanding the Need for Gym Floor Mats When you are piecing together a home gym on a budget, it is tempting to cut corners on accessories. However, gym floor mats serve three critical purposes that actually save you money and stress in the long run: safety, protection, and noise control. Firstly, safety is paramount. High-impact exercises like burpees or jumping jacks can take a toll on your joints if performed on concrete or thin carpet. A quality gym floor mat provides necessary cushioning to absorb impact. Secondly, let’s talk about your property. Dropping a kettlebell on a tile floor or scratching laminate with a heavy bench can result in expensive repair bills. Finally, there is the noise factor. If you live in a flat or have family members sleeping while you train, gym mat flooring significantly dampens the sound of weights clanking and footsteps thumping. Types of Gym Floor Mats and Their Costs Not all mats are created equal, and the price tags can vary significantly. Here is a breakdown of the most common options available in the UK market. Rubber Gym Floor Mats Rubber gym floor mats are the gold standard for heavy lifting zones. They are incredibly durable, dense, and provide excellent traction. However, they can be heavy to move and often sit at a higher price point. If you are exclusively doing Olympic lifting, these are great, but they might be overkill for a general budget setup. Foam Mats and Interlocking Tiles For the vast majority of home gyms, EVA foam interlocking tiles are the champion of value. These are lightweight, easy to assemble, and provide excellent shock absorption. They are perfect for yoga, HIIT, bodyweight exercises, and supporting standard gym equipment. Because they fit together like a puzzle, you can buy exactly what you need for your specific room dimensions, preventing waste. Carpet Tiles While very cheap, standard carpet tiles offer little in the way of shock absorption or equipment protection. They might stop scratches, but they won't protect your subfloor from a dropped dumbbell or provide the hygiene benefits of wipe-clean surfaces. Why Gym Floor Mats Are Worth the Investment It might feel counterintuitive to spend money on flooring when you are trying to save, but cheap gym mats UK retailers offer are actually an investment in longevity. Protecting Your Assets Think of a gym floor mat as an insurance policy. Replacing a cracked hardwood floorboard or a shattered ceramic tile costs significantly more than a set of foam tiles. Furthermore, the mats protect your equipment. Dumbbells and kettlebells last longer when they aren't repeatedly striking hard surfaces. Health and Safety Benefits Beyond protecting the floor, you need to protect yourself. Floor matting for gym setups provides a non-slip surface, which is crucial when you are sweating through a workout. Slipping while holding a weight is a recipe for injury. Additionally, the shock absorption properties of EVA foam reduce fatigue in your ankles and knees, allowing you to train harder and more often without nagging pains. Tips for Buying Gym Floor Mats on a Budget You don't need to sacrifice quality for price. Here is how to secure the best affordable gym floor mats UK based suppliers have to offer. Buy in Bulk or Bundles Many retailers offer tiered pricing. For example, buying a pack of 20 or 48 tiles often works out cheaper per square foot than buying smaller packs of 4. Measure your space carefully and buy enough to cover the area in one go to save on shipping and unit costs. Choose Versatile Materials Look for high-density EVA foam. It is the sweet spot between affordability and durability. Shark Power Gear offers gym floor mats UK customers love because they feature a non-slip textured surface and high-density foam that supports heavy equipment while remaining soft enough for floor work and yoga. Installation and Maintenance Extending the life of your mats saves money, too. Interlocking tiles are incredibly easy to install—you just snap them together. To maintain them, simply wipe them down with a damp cloth and mild soap after sweaty sessions. Shark Power Gear’s mats are water-resistant, making this process effortless. Conclusion Building a home gym on a budget is entirely possible with the right priorities. While it is fun to buy shiny new weights, do not neglect the foundation they sit on. Investing in budget home gym flooring like the Non-Slip EVA Foam Interlocking Tiles from Shark Power Gear ensures your home stays damage-free, your joints stay healthy, and your neighbors stay happy. It is a small upfront cost that delivers massive value for years to come. Ready to start your home gym journey? Check out the affordable range at Shark Power Gear today.

News

Gym Floor Care: How to Clean Gym Mats UK

by Saqlain Irshad on Jan 03 2026
There is nothing quite like the feeling of walking into your home gym, ready to crush a workout. But take a closer look at the ground beneath your feet. That surface catches every drop of sweat, every spilled water bottle, and the dust from your trainers. Without proper care, your workout sanctuary can quickly become a breeding ground for bacteria and unpleasant odours. Investing in high-quality flooring, like the gym floor mats UK fitness enthusiasts rely on, is the first step towards a professional setup. However, the longevity of that investment depends entirely on how well you look after it. A clean mat isn't just about aesthetics; it is about hygiene and safety. A slippery, grimy surface is an accident waiting to happen, while a well-maintained floor provides the grip and stability you need to lift heavy and move fast. Whether you are running a commercial facility or a garage gym, understanding the nuances of gym mat flooring care is essential. It ensures that the shock-absorbing properties of your gear remain intact, protecting your joints and your subfloor for years to come. In this guide, we will walk you through exactly how to clean gym mats effectively, ensuring your Shark Power Gear setup remains as fresh as the day you installed it. Understanding Your Surface: EVA Foam vs. Rubber Before you grab a bucket and mop, it is crucial to understand what you are cleaning. Different materials have different tolerances for moisture and chemicals. Rubber gym floor mats are common in heavy-weight zones due to their density, but many modern home gyms utilise EVA foam. Shark Power Gear specialises in high-density, non-slip EVA foam interlocking tiles. These are fantastic because they offer anti-fatigue cushioning and are naturally water-resistant. Because EVA foam is a closed-cell material, it doesn’t absorb sweat or water like a sponge, which makes gym mat care tips for this material slightly different from porous rubber. EVA foam is durable and non-toxic, but it can be sensitive to harsh abrasives. The interlocking puzzle design of the floor matting for gym spaces also means you have seams where dirt can accumulate. Recognising these specific needs is the foundation of a solid cleaning routine. The Daily Sweep: Prevention is Key The secret to effortless maintenance is consistency. You shouldn't wait until your gym floor mat changes colour to clean it. A simple daily routine prevents dirt from being ground into the surface texture. Remove Debris: Start by removing loose dirt, hair, and dust. A soft-bristle broom is ideal for this. Avoid stiff outdoor brooms which might scratch the textured surface of your EVA mats. Vacuum Carefully: If you prefer vacuuming, turn off the rotating beater bar. The brush can be too aggressive for foam and might degrade the non-slip surface over time. Use the suction-only setting or a soft brush attachment. Spot Clean: Did you drip a protein shake? Wipe it up immediately. The longer liquid sits, the stickier it becomes, attracting more dirt. A microfibre cloth and plain water are usually enough for fresh spills. The Weekly Wash: A Step-by-Step Guide Once a week, your floor needs a reset. This is where you address the invisible build-up of sweat and body oils. Step 1: Prepare Your Solution You don't need expensive industrial cleaners. In fact, mild is better. Mix warm water with a few drops of pH-neutral dish soap. Avoid bleach, ammonia, or solvent-based cleaners, as these can break down the chemical structure of foam and rubber, leading to crumbling or fading. Step 2: Mopping Technique Dip a sponge mop or a soft microfibre mop into your solution and wring it out thoroughly until it is just damp. You never want to flood the floor. Excess water can seep through the interlocking seams of your gym floor mats UK and get trapped underneath, potentially causing mould on your subfloor. Step 3: Scrub Gently For textured mats like those from Shark Power Gear, a quick pass with a mop might miss dirt trapped in the non-slip grooves. Use a soft scrub brush to gently agitate the surface in high-traffic areas. Step 4: Rinse and Dry Wipe the floor down with a mop dipped in fresh, clean water to remove any soapy residue. Soap buildup can actually make the floor slippery when wet, defeating the purpose of a non-slip surface. Finally, allow the room to air dry completely. Open windows or use a fan to circulate air. Deep Cleaning and Sanitisation Every few months, or after a particularly intense period of use, you need to go deeper. This is crucial for gym floor mat maintenance UK homeowners often overlook. If you have stubborn stains or odours, you can use a mixture of white vinegar and water (a 1:1 ratio). Vinegar is a natural disinfectant and deodoriser that cuts through grime without damaging the EVA foam. For the interlocking tiles provided by Shark Power Gear, one major advantage is the ability to disassemble them. If a specific tile is incredibly dirty, you can pop it out, take it outside (or to the shower), and give it a thorough scrub and rinse. Stand the tiles on their edge to dry completely before reassembling your puzzle. This also gives you a chance to clean the subfloor beneath the mats. Best Practices for Longevity Cleaning is only half the battle. How you treat the floor while you are using it dictates how long it lasts. Indoor Shoes Only: Street shoes track in small stones and grit that act like sandpaper on your mats. dedicating a pair of trainers specifically for the gym will extend the life of your flooring significantly. Protect Against Heavy Loads: While high-density EVA foam is shock-absorbing, extremely heavy, sharp objects can leave indentations. Consider using coaster pads under heavy stationary equipment like treadmills or racks if they are going to sit in one spot permanently. Avoid Direct Sunlight: UV rays can degrade foam and rubber over time, causing it to become brittle or discoloured. If your gym is in a conservatory or near large glass doors, consider using blinds during the hottest parts of the day. Check the Seams: Periodically check that the interlocking tabs are tight. A loose mat is a trip hazard and allows debris to get underneath. Why Regular Maintenance Matters Your home gym is an investment in your health, and your gym mat flooring is the foundation of that space. Neglecting it doesn't just look bad; it compromises your workout experience. A clean mat offers better grip for yoga and lifting, reduces dust allergies, and prevents that stale "locker room" smell from taking over your home. By following these simple steps—daily sweeping, weekly damp mopping, and avoiding harsh chemicals—you ensure that your Shark Power Gear mats remain a safe, professional-grade surface for years. It is about respecting your gear so it can support you in hitting those PBs.  

News

Do Gym Floor Mats Reduce Noise in Apartments?

by Saqlain Irshad on Jan 03 2026
Living in a flat or a shared house often means compromising on noise. You want to stay fit and active, but you also want to maintain a civil relationship with the people living below or next to you. There is nothing quite as anxiety-inducing as the sound of a heavy dumbbell hitting the floor, followed immediately by a broomstick banging against your ceiling from an angry neighbour. If you are setting up a home gym in a shared space, soundproofing isn't just a luxury; it is a necessity. While you might not be able to completely reconstruct your floor with professional acoustic insulation, there is a highly effective, accessible solution: high-quality gym floor mats. The right floor matting for gym setups can dampen vibrations, absorb shock, and significantly reduce the noise transfer that causes tension in shared living environments. But how exactly do they work, and are they enough to keep the peace? Understanding the Noise: Airborne vs. Impact To understand how a gym floor mat helps, we first need to look at the physics of sound. Noise travels in two primary ways: airborne and impact. Airborne Noise This is sound transmitted through the air. In a gym context, this includes the whirring of a fan, the music from your speakers, or your heavy breathing during a HIIT session. While thin walls are usually the culprit here, flooring plays a minor role. Impact Noise This is the real enemy of the home gym owner. Impact noise occurs when an object strikes a surface, creating vibrations that travel through the structure of the building. When you perform a burpee, jump rope, or drop a weight, the energy is transferred directly into the floor joists and travels easily into the room below. This is where gym floor mats noise reduction technology comes into play. A bare floor acts as a drum skin, amplifying the impact. A quality mat acts as a shock absorber, decoupling the impact from the structure and dissipating the energy before it becomes a noise complaint. The Role of EVA Foam in Noise Reduction When looking for soundproof gym flooring UK residents have several material options, but High-Density EVA (Ethylene Vinyl Acetate) foam stands out as a premier choice for home setups. Shark Power Gear specialises in Non-Slip EVA Foam Interlocking Gym Flooring Mats that are specifically engineered to handle this problem. Unlike hard plastic or thin yoga mats, high-density EVA foam compresses slightly upon impact. This compression is what absorbs the kinetic energy of a falling weight or a jumping foot. Instead of that energy vibrating through the floorboards, it is captured within the cellular structure of the foam. The result is a dull thud rather than a sharp, resonating bang. Why Shark Power Gear Mats Are the Best Gym Mats for Noise Not all mats are created equal. If you buy a thin, low-density mat, you might prevent scratches on your laminate, but you won't stop the noise. Shark Power Gear offers gym floor mats UK fitness enthusiasts rely on because of their specific construction. 1. High-Density Shock Absorption The Shark Power Gear mats feature a high-density composition. This thickness is crucial. It provides a substantial barrier between your equipment and the subfloor. This "cushioning" effect is excellent for anti-fatigue purposes—saving your joints during cardio—but it is equally vital for acoustic dampening. 2. The Interlocking Design Gaps in flooring allow sound to escape. Shark Power Gear’s mats utilize a jigsaw-style interlocking system. This ensures that the mats stay tightly connected, creating a uniform surface that doesn't slide apart during vigorous exercise. A continuous surface area is far more effective at dampening sound than individual, unconnected tiles. 3. Textured Surface for Stability Noise often comes from slips and skids. The textured, non-slip surface of these mats ensures that your equipment stays where you put it. Stable equipment means fewer accidental drops and less sliding noise, contributing to a quieter workout environment. Real-World Scenarios: When to Use Gym Floor Mats Are these mats right for your specific situation? Here are a few common scenarios where gym mat flooring makes a massive difference. The Upstairs Apartment If you are doing callisthenics, yoga, or light dumbbell work on a second floor, these mats are essential. The impact of a simple jump squat can sound like a hammer to the person below. Laying down a perimeter of Shark Power Gear interlocking mats creates a "floating floor" effect that drastically cuts down vibration transfer. The Garage Conversion Garages often have concrete floors. While concrete is solid, it is also acoustic. Dropping a kettlebell on concrete sends a sharp vibration through the slab that can be felt in the attached house. Using rubber gym floor mats or high-density EVA foam tiles protects the concrete from cracking and stops that vibration from travelling through the walls into your living room. The Early Morning Lifter If you train while your family is asleep, silence is golden. Metal weights clanking against a hardwood or tiled floor will wake the whole house. A dedicated zone of floor matting for gym equipment creates a silent landing zone, allowing you to deadlift at 6 AM without becoming a domestic nuisance. Installation and Maintenance for Maximum Effect To get the most out of your gym floor mats, proper installation is key. Clean the Subfloor: Ensure your existing floor is free of dust and debris. Small grit under the mat can cause friction and reduce the grip. Measure Your Space: Because Shark Power Gear mats are interlocking, you can customize the size. Whether you need 16 sq ft for a yoga corner or 192 sq ft for a full garage gym, buy the correct bundle size. Lock Them Tight: Assemble the pieces like a puzzle. Ensure the seams are flush. Shark Power Gear includes bonus edge pieces, which provide a straight, clean finish that looks professional and keeps the matting secure. Double Up (Optional): If you are lifting particularly heavy weights (like deadlifts over 100kg), consider a double layer of mats in the drop zones for extra acoustic protection. Maintenance is equally simple. These mats are water-resistant and easy to clean. Sweat and spills can be wiped away with a damp cloth, preventing the buildup of odours and keeping your gym hygienic. Conclusion Can gym floor mats reduce noise? The answer is a resounding yes. While no flooring can make a dropped barbell completely silent, the right choice of flooring can reduce the noise from a "structure-shaking bang" to a "muffled thud." For UK residents living in flats, semi-detached houses, or shared accommodations, investing in gym floor mats noise reduction technology is the smartest way to future-proof your training. It protects your floor, protects your joints, and most importantly, protects your relationship with your neighbours. Shark Power Gear’s Non-Slip EVA Foam mats offer the perfect balance of durability, acoustic dampening, and affordability. Don't let the fear of noise keep you from hitting your fitness goals.  

News

5 Gym Flooring Mistakes to Avoid | UK Setup Tips

by Saqlain Irshad on Jan 03 2026
You have the power rack sorted, the dumbbells are on their way, and you have even picked out the perfect sound system. But look down for a moment. What are you standing on? Many fitness enthusiasts in the UK pour their budget into equipment while treating their flooring as an afterthought. This is a critical error. The right foundation protects your joints, your expensive kit, and the subfloor beneath. Get it wrong, and you are looking at damaged concrete, cracked weights, and a space that feels unprofessional. Whether you are fitting out a commercial facility in London or a garage gym in Manchester, avoiding common pitfalls is essential for safety and longevity. Here is a guide to the top mistakes people make with floor matting for gym setups and how you can get it right the first time with Shark Power Gear. 1. Choosing the Wrong Type of Flooring The first and most significant error is misidentifying the material you need. A quick online search for a gym floor mat yields thousands of results, ranging from fluffy carpets to soft foam puzzle pieces. Foam vs. Rubber One of the most frequent gym flooring mistakes is using EVA foam tiles for heavy lifting areas. Foam is excellent for yoga, Pilates, or a children’s play area because it is soft and comfortable. However, it compresses too easily under heavy loads. If you place a heavy squat rack or drop a loaded barbell on foam, it will dent, tear, and provide an unstable surface for your lifts. Stability is key when you are squatting or deadlifting; you want a firm base, not a squishy one. The Shark Power Gear Standard For any functional fitness, weightlifting, or cardio zone, you need gym mat flooring made from high-density rubber. Rubber provides the necessary traction to prevent slipping and the durability to withstand repeated impact. Shark Power Gear specialises in premium rubber solutions that offer the firmness required for Olympic lifts while still protecting your equipment. 2. Not Considering Thickness and Density Not all rubber is created equal. A common trap is assuming that any black rubber mat will do the job. Ignoring thickness and density is one of those common gym mat errors that leads to buyer's remorse within a few months. Why Density Matters Density determines how the mat absorbs energy. Low-density rubber might look thick, but it can crumble over time or absorb sweat and moisture, leading to hygiene issues. High-density rubber surfaces, like those offered by Shark Power Gear, are non-porous and incredibly tough. selecting the Right Thickness Thickness is equally important and depends entirely on your training style: 4mm - 8mm: Suitable for bodyweight exercises, cardio machines, and general protection against scratches. 10mm - 15mm: The sweet spot for most home gyms and commercial weight rooms. This handles dropped dumbbells and general weight training. 20mm - 40mm: Essential for Olympic lifting zones where heavy barbells are dropped from overhead. If you install thin 6mm mats in a deadlift zone, you risk cracking the concrete subfloor beneath. Always match the thickness to the intensity of your training. 3. Ignoring Subfloor Preparation You have invested in top-tier Shark Power Gear mats, but if you throw them over a debris-filled or uneven surface, you are wasting your money. One of the best gym mat setup tips UK gym owners can follow is to prep the base layer correctly. The Level Playing Field Rubber mats will contour to the shape of the floor beneath them. If your garage floor has ridges, holes, or sharp stones, these will eventually wear through the bottom of your mats. Furthermore, an uneven floor creates trip hazards where the mats join. Moisture and Temperature In the UK, damp garages and outbuildings are common. If you lay rubber mats directly over damp concrete, you risk trapping moisture, which can lead to mould growth and nasty odours. Ensure your subfloor is dry, clean, and level. If damp is an issue, consider a damp-proof membrane before laying your flooring. 4. Skimping on Quality The phrase "buy cheap, buy twice" was practically invented for gym floor mats UK buyers. It is tempting to save a few pounds by purchasing budget, unbranded mats from general marketplaces, but the difference in quality is stark. The Smell Test Cheap recycled rubber often carries a pungent, chemical smell that never quite leaves the room. It smells like burning tyres and can cause headaches in enclosed spaces. Shark Power Gear prioritises high-quality manufacturing processes that minimise odour, making them suitable for indoor home use immediately. Durability and Crumbling Budget rubber gym floor mats often use low-grade binding agents. After a few months of burpees and deadlifts, you will notice black crumbs appearing on your clothes and skin. This is the mat disintegrating. High-quality mats remain intact year after year. When you choose Shark Power Gear, you are investing in professional-grade materials designed to withstand the rigours of a commercial environment, ensuring your home setup remains pristine. 5. Neglecting Maintenance Once your gym is installed, many people believe the job is done. However, treating your floor matting for gym areas with neglect will shorten their lifespan. Cleaning Protocols Rubber is robust, but it can be damaged by harsh chemicals. A common mistake is using bleach or abrasive acids to clean the floor. These chemicals can break down the binding agents in the rubber, causing it to dry out, crack, and lose its colour. The Right Way to Clean Maintenance is simple if done correctly: Vacuum regularly: Dust and chalk grit act like sandpaper. Remove them frequently. Use neutral pH cleaners: A simple mop with warm water and a mild, pH-neutral soap is usually sufficient. Allow to dry: Ensure the room is ventilated so the moisture evaporates quickly. Shark Power Gear mats are designed to be low maintenance, with surfaces that are easy to wipe down, keeping your training space hygienic and looking sharp. Build Your Foundation with Shark Power Gear Your gym flooring is the stage upon which all your progress happens. It supports every PR, catches every drop, and defines the aesthetic of your training space. By avoiding these common gym flooring mistakes—from choosing the wrong material to neglecting the subfloor—you ensure a safer and more professional environment. Don't let a bad floor undermine your hard work. Trust in the durability, safety, and premium finish of Shark Power Gear to provide the solid ground you need to reach your fitness goals.  

News

Best Flooring for Weightlifting and Heavy Equipment in a Home Gym

by Saqlain Irshad on Jan 03 2026
You have the power rack assembled. The Olympic bar is ready, and the iron plates are stacked and waiting. But before you attempt that new personal best on your deadlift, look down. Is your floor ready to take the hit? Building a home gym is an investment in your health and strength, but neglecting the foundation—your flooring—is a rookie mistake that can cost you dearly. Dropping heavy weights on concrete can crack the foundation, while dropping them on hardwood or tile guarantees destruction. Moreover, the shock to your joints from lifting on an unforgiving surface can hinder your progress. For fitness enthusiasts in the UK, finding the right protection is essential. This guide explores the best options for your setup, ensuring your garage or spare room remains intact while you train like a beast. We will break down why Shark Power Gear offers the ultimate solution for your training sanctuary. Why Specialized Flooring Matters You might think an old carpet or a thin yoga mat is sufficient. It isn’t. When you are moving serious weight, the physics change. A 100kg barbell dropped from hip height generates a massive amount of force. Proper floor matting for gym setups serves three primary functions: Protection: It acts as a shield between your heavy equipment and the subfloor. Safety: It provides traction to prevent slipping during heavy squats or bench presses. Acoustics: It dampens the loud crash of weights, which is vital if you have neighbors or family members nearby. Types of Flooring for Home Gyms When outfitting a gym, you generally encounter three main categories of flooring. However, not all are created equal when heavy iron is involved. Rubber Flooring This is the gold standard for weightlifting. Rubber gym floor mats provide the density required to absorb high-impact shocks without compressing too much. Unlike softer materials, rubber doesn't permanently dent under the weight of a power rack or heavy dumbbells. It is durable, easy to clean, and provides excellent grip. Foam Tiles (EVA Foam) Often sold as puzzle pieces, these are cheap and widely available. While great for yoga, pilates, or a children's play area, they are generally unsuitable for heavy weightlifting. The foam is too soft; it compresses under heavy loads, making your footing unstable during squats. Furthermore, heavy equipment will cut right through it over time. Hardwood and Concrete Lifting directly on these surfaces is a recipe for disaster. Concrete can chip and create dust, while hardwood will scratch and dent instantly. They offer zero shock absorption, meaning all the impact energy returns to your equipment and your body. The Superior Choice: Rubber Gym Floor Mats For anyone serious about lifting, rubber is the only viable option. We specialize in high-quality rubber flooring designed specifically for the UK market. Let’s look at why weightlifting floor mats made of rubber are the superior choice. Unmatched Durability Shark Power Gear mats are engineered to withstand punishment. Whether you are dropping dumbbells or parking a heavy treadmill, our heavy-duty gym floor mats UK lifters trust are designed to resist tearing, cracking, and permanent indentation. Stability and Safety When you are under a heavy bar, you need to feel grounded. Soft flooring creates a "marshmallow" effect where your feet sink, destabilizing your ankles and knees. Our rubber mats provide a firm surface that allows you to drive through your heels safely. Noise Reduction If you are training in a garage or an upstairs room, noise travels. Dense rubber absorbs sound vibration significantly better than any other material. Key Considerations When Choosing Your Flooring Before you buy, you need to assess your specific space and training style. Here is what you should look for to find the best gym flooring for weights. Thickness and Impact Absorption For general fitness, 8mm might suffice. However, for weightlifting and powerlifting, you need more cushion. We generally recommend mats that are at least 15mm to 20mm thick for areas where weights might be dropped. This thickness ensures that the gym floor mat fully absorbs the energy of the drop, protecting both the weight plates and the concrete below. Surface Texture You want a surface that is easy to clean but not slippery. Shark Power Gear mats feature a surface texture that provides optimal grip for rubber-soled shoes, ensuring you don't slide out during a sumo deadlift or a wide-stance squat. Odor and Material Quality Low-quality rubber products often carry a pungent, chemical smell that never goes away. Shark Power Gear prioritizes high-quality manufacturing processes to minimize odor, making our mats suitable for indoor use in smaller rooms with less ventilation. Installation Style Do you need wall-to-wall coverage or just a dedicated lifting platform? Standalone Mats: Ideal for defining a specific lifting zone. Interlocking Tiles: Great for covering odd-shaped rooms. Rolls: Efficient for covering large garage gym areas quickly. Installation Tips for Your Gym Mat Flooring Installing your new Shark Power Gear flooring is straightforward, but doing it right ensures longevity. 1. Prepare the SubfloorBefore laying down any gym floor mats UK residents must ensure the subfloor is clean, dry, and level. Sweep away any dust, oil, or debris. If you are laying mats over concrete in a garage, ensure there is no moisture seepage. 2. Acclimatize the MatsRubber can expand and contract slightly with temperature changes. When your mats arrive, unroll them or lay them flat in the room where they will be installed for 24 hours. This allows them to settle into their natural shape and temperature. 3. Tight fit is KeyIf you are filling a room, push the mats tightly against each other. For heavy lifting areas, you can use double-sided carpet tape to secure the mats to the floor to prevent them from shifting during intense workouts. 4. Cutting to SizeIf you need to fit the mats around a pillar or into a corner, use a sharp utility knife and a straight edge (like a metal ruler). Measure twice, cut once. Rubber is tough, so you may need to make several passes with the knife to get a clean cut. Maintenance and Care One of the massive benefits of gym mat flooring from Shark Power Gear is the low maintenance. Cleaning: Simply vacuum regular dust and debris. For a deeper clean, use a damp mop with a mild soap and water solution. Avoid harsh chemicals or bleach, as these can degrade the rubber compounds over time. Inspection: Periodically check your mats for wear and tear, although high-quality rubber will last for years. Conclusion: Invest in Your Foundation Your home gym is a sanctuary for self-improvement. Don't compromise that space with inadequate flooring. While foam might save a few pounds initially, it will cost you more in the long run when you have to replace it—or worse, repair your subfloor. For the best gym flooring for weights, heavy-duty rubber is the clear winner. It offers the protection, stability, and acoustic dampening that serious lifters require. Shark Power Gear is dedicated to providing the UK market with top-tier equipment. Our flooring solutions are tested to handle the heaviest drops and the most intense sessions. Whether you are outfitting a professional facility or a garage corner, we have the matting you need. Ready to build the gym you deserve? Browse the Shark Power Gear collection today and secure the foundation of your fitness journey.

News

5 Key Benefits of Gym Flooring for Your UK Home Gym

by Saqlain Irshad on Jan 03 2026
The rise of the home gym has been nothing short of a revolution across the UK. We are converting garages, spare bedrooms, and even corners of the living room into personal fitness sanctuaries. It is easy to get caught up in the excitement of buying a new power rack, a shiny set of dumbbells, or the latest cardio machine. However, amidst the rush to acquire heavy metal, one crucial element often gets overlooked: what goes underneath it all. Installing proper flooring is arguably one of the most important steps in creating a functional, safe, and professional training environment. Without it, you are essentially lifting weights in a standard room, which is a recipe for damaged property and potential injury. At Shark Power Gear, we understand that a great workout starts from the ground up. Whether you are deadlifting heavy or engaging in high-intensity interval training, the right foundation makes all the difference. Here is why investing in quality matting is the smartest move you can make for your fitness space. Protect Your Property from Heavy Impact The most immediate and obvious reason to install floor matting for gym use is protection. Home gyms are typically set up in spaces with domestic flooring—be it laminate, hardwood, carpet, or concrete. These surfaces simply aren't designed to withstand the brutal impact of cast iron plates or the weight of heavy machinery. Dropping a dumbbell or a barbell, even from a small height, can crack tiles, dent timber, or shatter laminate. Rubber gym floor mats act as a heavy-duty shield, absorbing the shock of dropped weights and distributing the load of heavy equipment. This barrier ensures that your original floor remains pristine underneath, saving you from expensive repair bills down the line. By using Shark Power Gear mats, you are essentially purchasing an insurance policy for your home. Enhancing Safety and Preventing Injury Safety should always be the priority when training alone. Domestic floors can be incredibly slippery, especially once you start to sweat. Trying to hold a heavy squat or perform dynamic movements on a slick surface is dangerous and increases the likelihood of slips and falls. One of the key benefits of gym flooring is the superior traction it provides. High-quality rubber mats offer excellent grip, ensuring your feet stay planted exactly where they need to be. This stability allows you to generate force safely and confidently. Furthermore, the shock-absorbent nature of gym mat flooring reduces the impact on your joints. Running or jumping on concrete can wreak havoc on your knees and ankles; a rubber surface cushions these movements, allowing you to train harder for longer. Keep the Noise Down If you live in a flat, a semi-detached house, or simply have family members who don't want to hear the thud of weights at 6 AM, noise reduction is vital. The sound of metal plates clanking against a hard floor travels easily through structures, potentially causing friction with neighbours or housemates. This is where understanding why use gym mats becomes crucial for maintaining peace in your household. Dense rubber flooring dampens sound significantly. It absorbs the vibration caused by cardio equipment and deadens the acoustic impact of weights hitting the floor. For UK homeowners conscious of noise pollution, Shark Power Gear offers the acoustic dampening needed to keep your workouts discreet. Boost Comfort and Ergonomics A cold concrete garage floor is not an inviting place to do push-ups, burpees, or yoga stretches. A bare floor is unforgiving and uncomfortable, which can subconsciously deter you from spending time in your gym. Adding a gym floor mat transforms the feel of the room immediately. It provides a layer of thermal insulation against cold substrates, making the space warmer and more inviting during those chilly British winters. It also provides just enough give to make floor-based exercises comfortable without being so soft that it compromises your stability during lifts. This balance of comfort and firmness is one of the specific gym mat advantages UK fitness enthusiasts look for when setting up their spaces. Hassle-Free Maintenance and Hygiene Your training space should be a place of focus, not a cleaning burden. Carpets trap sweat, odours, and dust, making them unhygienic choices for a workout zone. Wood floors can warp with moisture. In contrast, specialist gym floor mats uk residents use are designed to be sweat-resistant and incredibly easy to clean. Shark Power Gear flooring is water-resistant, meaning sweat sits on the surface rather than soaking in. A quick wipe down with a damp cloth or a mild disinfectant is usually all it takes to keep your gym smelling fresh and looking professional. This low-maintenance aspect ensures your gym remains a hygienic environment ready for your next session. Transform Your Workout Space with Shark Power Gear Building a home gym is an investment in your health, and the finishing touches matter. By overlooking flooring, you risk damaging your home, injuring yourself, and limiting the potential of your workouts. From protecting your sub-floor to providing a professional, non-slip surface, the benefits are undeniable. If you are ready to take your home setup to the next level, Shark Power Gear has the premium solutions you need. Don't let a slippery or fragile floor hold you back—build on a foundation of strength.

News

How to Choose the Right Gym Floor Mat Thickness: UK Guide

by Saqlain Irshad on Jan 03 2026
Building a home gym or upgrading a commercial facility involves more than just buying heavy weights and shiny machines. One of the most overlooked aspects of a safe and effective training space is the foundation you stand on. The right gym floor mat protects your subfloor, your equipment, and your joints. But with so many options on the market, how do you know which thickness is right for you? When looking for gym floor mats in the UK, you might be overwhelmed by the varying millimetres and materials available. Choosing the wrong specifications can lead to damaged floors if you drop a heavy barbell, or an unstable surface if the mat is too soft for squats. It is a balancing act between cushioning, stability, and durability. At Shark Power Gear, we understand that every gym setup is unique. Whether you are converting a garage into a powerlifting station or setting up a corner for yoga and HIIT, the thickness of your flooring makes a massive difference. This gym mat thickness guide breaks down exactly what you need to know to make the best investment for your training space. Why Gym Mat Thickness Matters The thickness of your gym mat flooring is not just an aesthetic choice; it is a functional necessity. The primary purpose of gym flooring is to absorb impact. When you perform high-impact exercises or drop weights, that energy has to go somewhere. If your mat is too thin, the force travels straight through to the concrete, wood, or tile underneath. This can cause cracking in the subfloor and damage your expensive dumbbells or plates. Conversely, a mat that is too thick and soft (like a judo mat) might feel great for stretching but will be terrible for lifting weights, as it creates an unstable surface that compromises your balance and power transfer. Additionally, sound insulation is a major factor, especially for home gyms in the UK where you might have neighbours or family members nearby. Thicker rubber gym floor mats are superior at dampening the noise of dropped weights and jumping movements. Factors to Consider When Choosing Thickness Before you purchase floor matting for gym use, consider these three critical factors: 1. The Type of Subfloor What is currently underneath your gym area? If you are laying mats over carpet, you generally need a firmer, thicker mat to prevent the carpet pile from making the surface unstable. If you are on concrete (like in a garage), you need sufficient shock absorption to protect your joints from the hard impact. Wood floors require careful protection to prevent scratches and dents, meaning a moderate-to-thick mat is usually essential. 2. The Weight of Your Equipment Are you using heavy power racks, treadmills, or sets of 50kg dumbbells? Heavy equipment can compress thinner mats over time, leaving permanent indentations and reducing their effectiveness. Heavier loads generally require thicker, denser rubber to withstand the pressure without bottoming out. 3. Usage Intensity A yoga studio has vastly different needs compared to a CrossFit box. High-intensity training involves jumping, sprinting, and dropping weights, all of which demand robust shock absorption. Low-impact activities prioritize comfort and surface texture over sheer thickness. Recommended Thickness by Activity To find the best thickness gym flooring UK for your specific needs, look at the primary activities you will be performing. Light Exercise and Yoga (4mm - 6mm) For bodyweight exercises, yoga, and Pilates, you typically do not need heavy-duty rubber. A standard yoga mat thickness of around 4mm to 6mm provides enough cushioning for your knees and elbows without being bulky. However, these are usually portable mats rather than permanent flooring solutions. Cardio and Machine Areas (8mm - 10mm) If your gym is focused on treadmills, ellipticals, or light dumbbell work, gym mat thickness in the 8mm to 10mm range is often sufficient. This thickness is tough enough to protect floors from the vibration of machines and the occasional dropped light weight. It provides a solid, stable surface that won’t feel "squishy" underfoot. Functional Fitness and Garages (15mm - 20mm) For general garage gyms, functional fitness, and moderate weightlifting, 15mm to 20mm is the industry standard for rubber gym floor mats uk. This is the sweet spot for most home gym owners in the UK. It offers excellent protection for concrete floors and significantly reduces noise. At Shark Power Gear, we often recommend this range for multipurpose spaces where you might be doing burpees one minute and deadlifts the next. Heavy Weightlifting and Olympic Lifting (20mm - 40mm+) If you are deadlifting heavy loads or performing Olympic lifts (where weights are dropped from overhead), you need maximum protection. A gym floor mat of 20mm is the minimum, but many serious lifters opt for 30mm or 40mm tiles, or invest in a specific lifting platform. At this level, the flooring must absorb massive amounts of kinetic energy to prevent the barbell from bouncing dangerously and to save your foundation from cracking. Material Types and Quality While thickness is key, the material quality dictates how that thickness performs. Rubber Flooring Rubber is the gold standard for gym mat flooring. It is durable, water-resistant, and provides excellent grip. Most high-quality gym mats, like those from Shark Power Gear, are made from recycled crumb rubber or vulcanised rubber. Rolled Rubber: Often comes in thinner options (6mm-10mm) and is great for covering large areas with fewer seams. Rubber Tiles: typically available in thicker options (15mm-40mm). These are easier to install and replace if one gets damaged. Foam Mats EVA foam tiles are popular because they are cheap and lightweight. However, for a serious gym setup, they are often inadequate. They compress too easily under heavy weight and can be slippery when wet. While they might be 12mm thick, a 12mm foam mat offers significantly less protection and stability than an 8mm rubber mat. For longevity and safety, rubber is almost always the superior choice for floor matting for gym setups. Maintenance Tips for Your Gym Mats Once you have installed your Shark Power Gear mats, keeping them in top condition is straightforward. Regular Cleaning: Sweep or vacuum dust and chalk residue regularly. For a deeper clean, use a damp mop with a pH-neutral cleaner. Avoid harsh chemicals or bleach, as these can break down the rubber compounds over time. Air Circulation: Rubber can hold moisture underneath if not installed correctly. Ensure your subfloor is dry before laying the mats. If you are cleaning them with water, let them air dry completely. Rotate High-Traffic Areas: If you always drop weights in the exact same spot, that specific tile might wear down faster than the rest. Rotating tiles from the edge of the room to the centre can extend the life of your flooring. Securing Your Foundation with Shark Power Gear Selecting the right gym mat thickness is a critical step in building a training environment that is safe, professional, and durable. Whether you are setting up a commercial facility or a personal sanctuary in your garage, the floor is the foundation of every rep. If you are just starting out with light weights, an 8mm-10mm mat might be perfect. For those pushing their limits with heavy iron, stepping up to a 20mm Shark Power Gear rubber mat will ensure your floor—and your focus—remains unbroken. Don't compromise on safety or quality. Browse our range at Shark Power Gear to find the robust, high-performance flooring solutions that UK athletes trust.  

News

Rubber vs Foam Gym Mats: Which is Best for Your Home Gym?

by Saqlain Irshad on Dec 25 2025
Building a home gym is an exciting milestone for any fitness enthusiast. You’ve picked out your weights, maybe a bench, and perhaps even a cardio machine. But there is one crucial element that often gets overlooked until the very last minute: the flooring. Choosing the right foundation is about more than just aesthetics; it’s about safety, protecting your subfloor, and maximizing the lifespan of your equipment. When you start browsing for gym floor mats uk or researching floor matting for gym setups, you will likely encounter two main contenders: rubber and foam. At Shark Power Gear, we understand that making the right choice can be confusing. Should you prioritize the soft cushion of foam or the rugged durability of rubber? This guide breaks down the debate of rubber gym mats vs foam to help you decide exactly what your training space needs. What Are Rubber Gym Mats? 
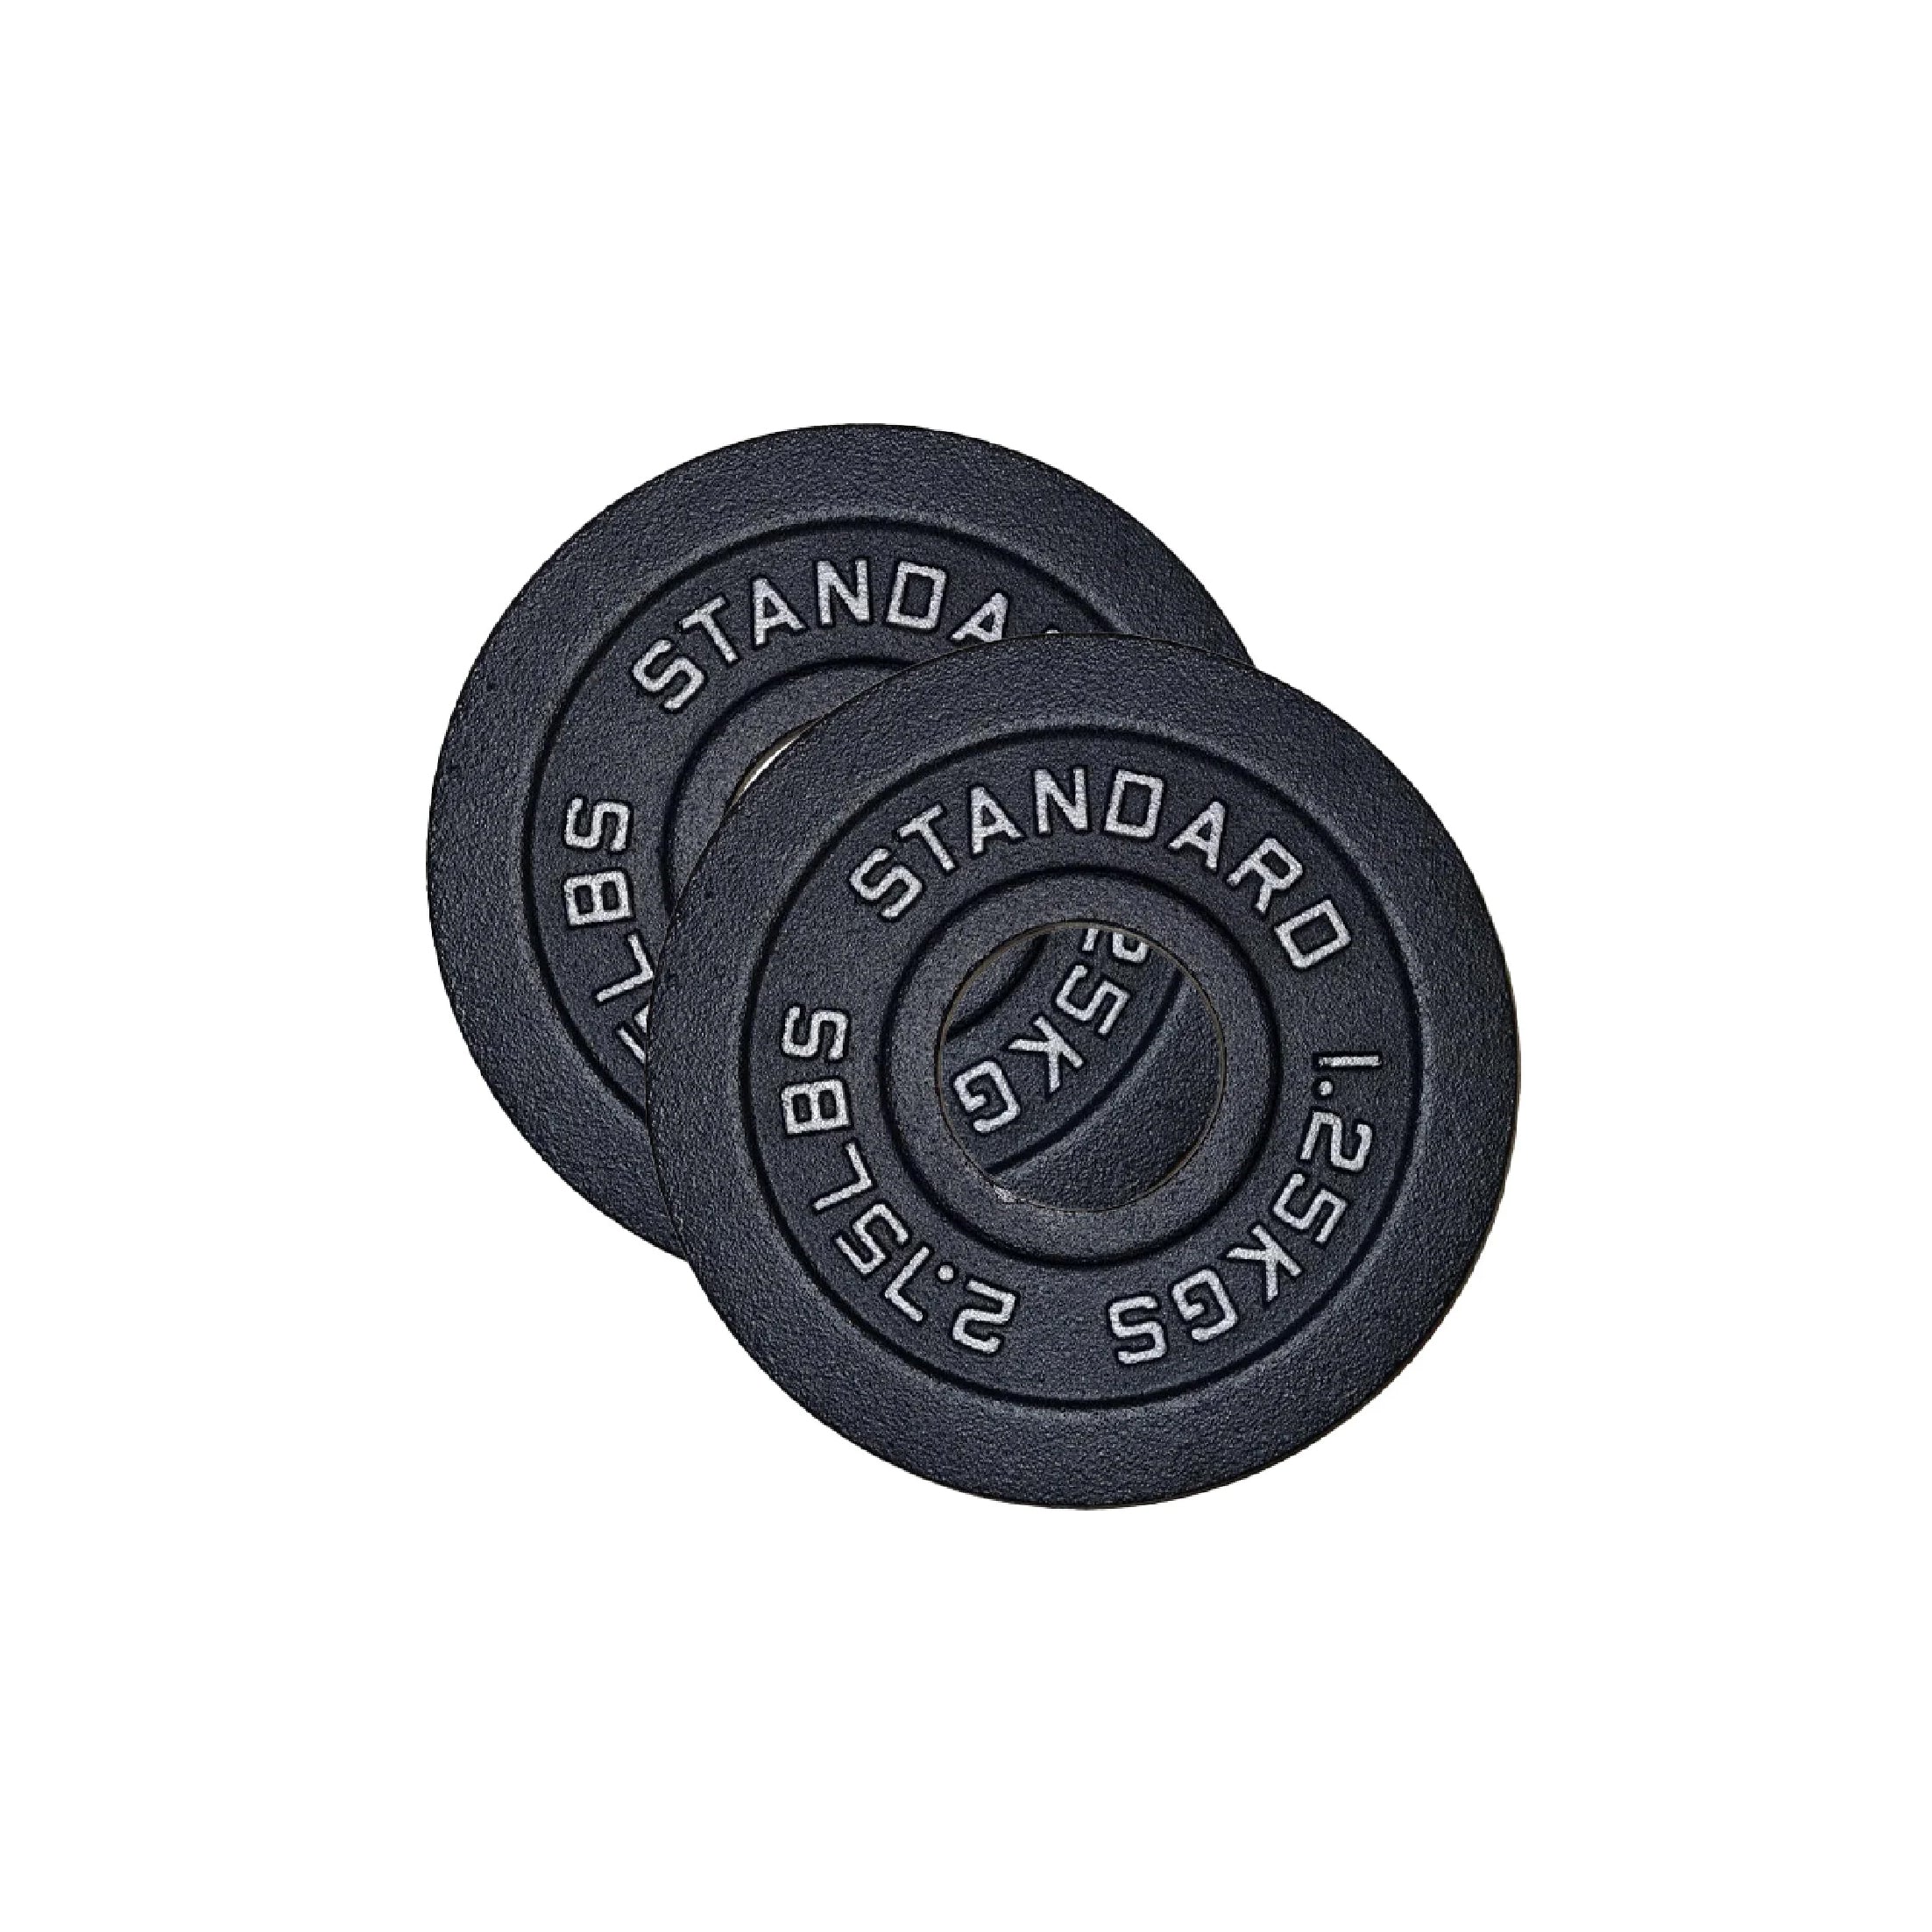
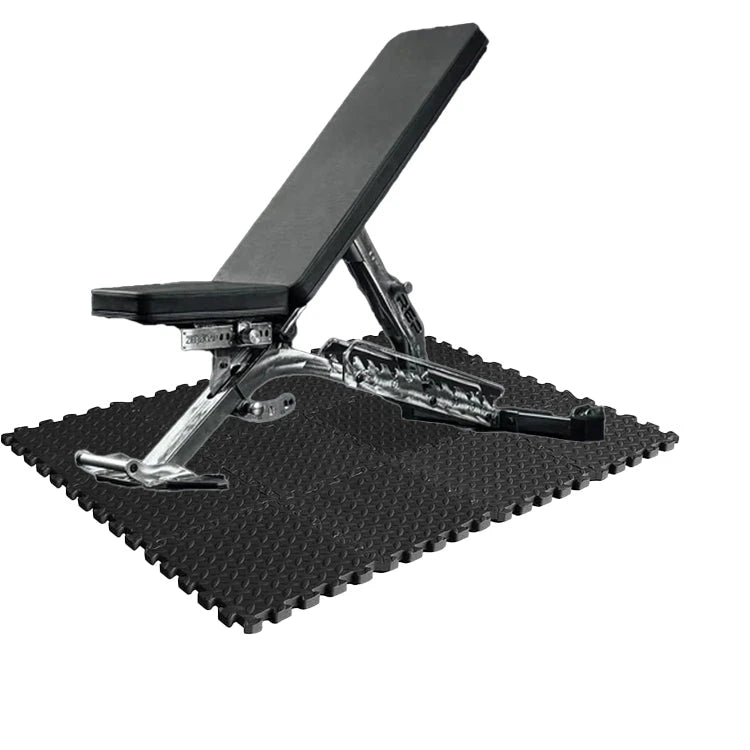
Rubber gym floor mats are the gold standard for commercial gyms and serious home weight rooms. typically made from recycled tires or virgin rubber, these mats are dense, heavy, and incredibly tough. They are designed to withstand significant punishment, making them the top choice for anyone lifting heavy weights. The Benefits of Rubber Flooring The primary advantage of rubber is durability. If you plan on dropping a loaded barbell or setting down heavy dumbbells, rubber absorbs the shock effectively. This protects your concrete or wood subfloor from cracking and prevents your equipment from getting damaged. Rubber also offers excellent traction. When you are sweating through a deadlift or a squat, the last thing you want is a slippery surface. Rubber provides a stable, non-slip grip that keeps you safe during intense movements. Another key benefit is water resistance. Rubber doesn't absorb moisture, which means sweat and spills can be wiped away easily without worrying about mold or lingering odors. For a garage gym in the UK, where moisture can sometimes be an issue, this is a massive plus. The Drawbacks Rubber is heavy. Moving a roll or a large mat requires some effort. Additionally, fresh rubber products can have a distinct scent when you first unroll them, though this usually fades with proper ventilation. While they offer shock absorption, they aren't "soft" in the way a pillow is soft—they are firm and stable. What Are Foam Gym Mats? 
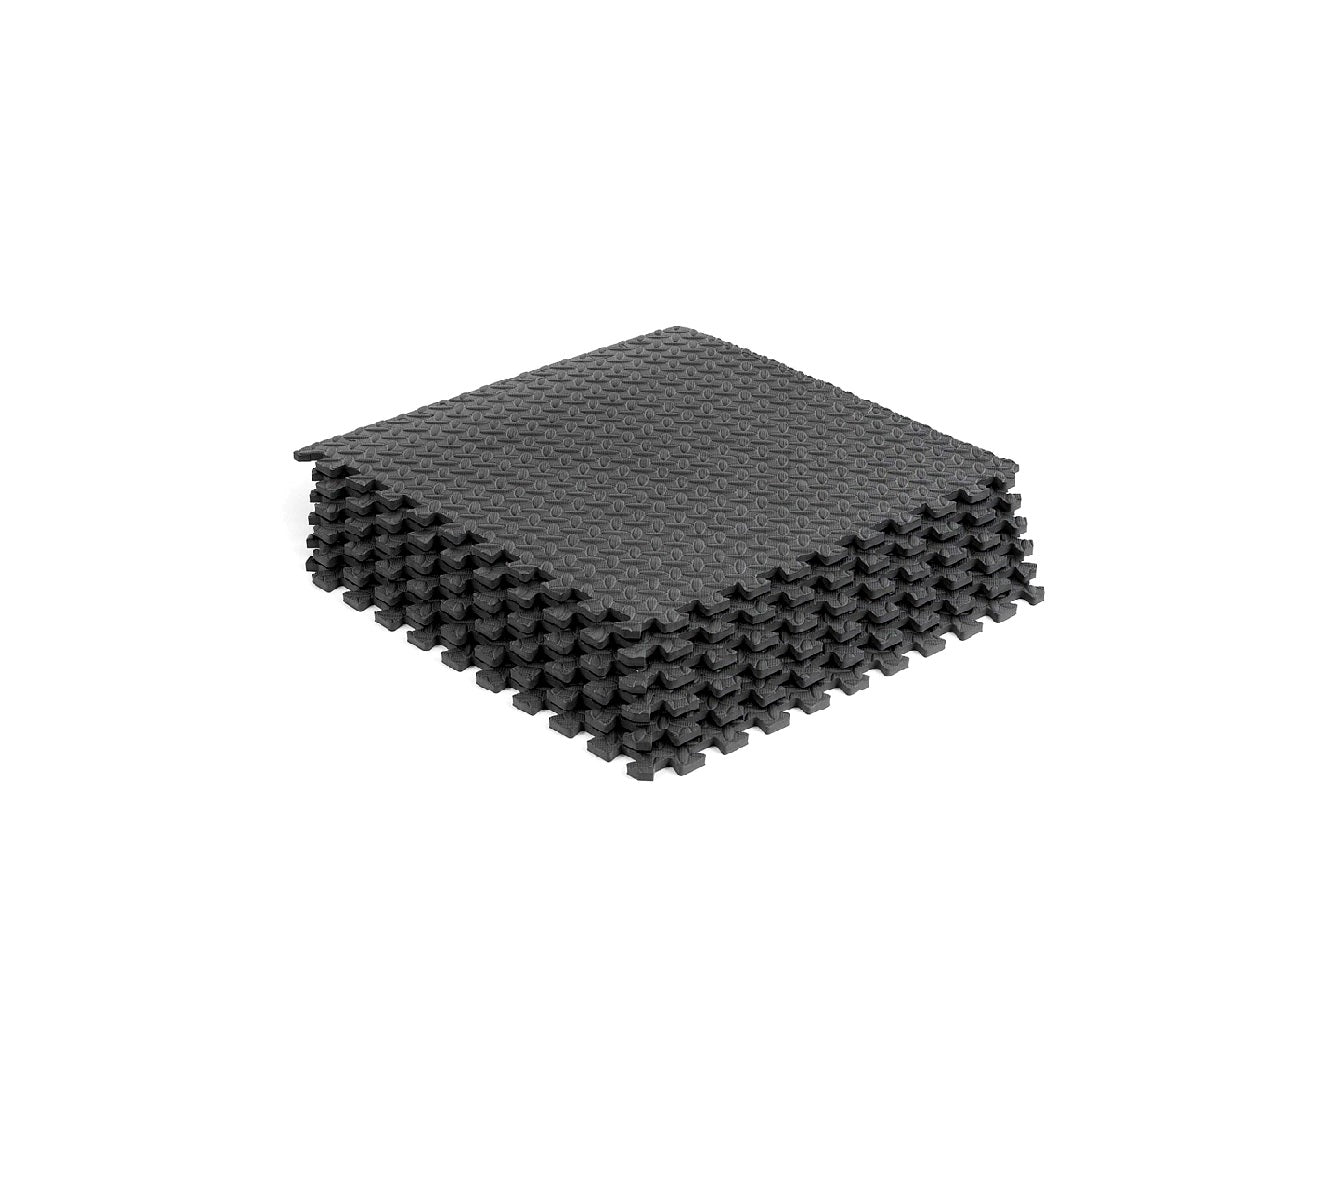
On the other side of the spectrum, we have foam mats. These are usually made from EVA (Ethylene Vinyl Acetate) foam. You often see these as interlocking puzzle tiles in bright colors or standard black. They are lightweight, affordable, and very soft to the touch. The Benefits of Foam Flooring The biggest selling point for foam is comfort. If your workout routine involves a lot of floor work—think yoga, Pilates, stretching, or sit-ups—foam provides a nice cushion for your spine, knees, and elbows. It creates a barrier against the cold, hard ground, making your workout space feel warmer and more inviting. Price is another factor. Foam is generally cheaper than rubber, making it an attractive option for beginners setting up a budget-friendly exercise area. It is also incredibly light and easy to install; you can cover a room in minutes and cut the tiles to fit awkward corners with just a utility knife. The Drawbacks While foam is comfortable, it lacks the density required for heavy equipment. If you place a heavy squat rack or treadmill on foam tiles, they will compress permanently, leaving deep indentations. Foam is also susceptible to damage. Sharp objects, heavy weights dropped from a height, or even vigorous jumping jacks with shoes on can tear or scuff the surface. Furthermore, when comparing foam vs rubber gym flooring UK options, foam can become slippery when wet, which poses a safety risk during high-intensity cardio. Rubber vs. Foam: Key Differences To help you determine the best gym mat material for your specific needs, let’s look at how they stack up in a direct comparison. Durability There is no contest here; rubber wins hands down. Rubber is built to last for decades. It can handle heavy foot traffic, dropped weights, and heavy machinery without flinching. Foam is a temporary solution for heavy use and will need replacing much sooner if subjected to wear and tear. Comfort Foam takes the prize for comfort. If you are doing calisthenics, tumbling, or martial arts where you are constantly hitting the deck, foam offers the impact protection your body needs. Rubber is forgiving, but it is firm. Installation Both options are relatively DIY-friendly. Shark Power Gear offers gym mat flooring solutions that are designed for easy setup. Foam tiles interlock effortlessly. Rubber mats can be heavy to move into place, but once they are down, their weight keeps them from sliding around, often without needing adhesive. Cost Foam is generally the lower-cost entry point. However, when you factor in longevity, rubber often provides better value over time. You might buy one set of rubber mats for life, whereas foam might need refreshing every few years depending on usage. Factors to Consider Before Buying Still on the fence about rubber gym mats vs foam? Consider these three factors regarding your personal training style and environment. 1. What is your training style? This is the most critical question. 
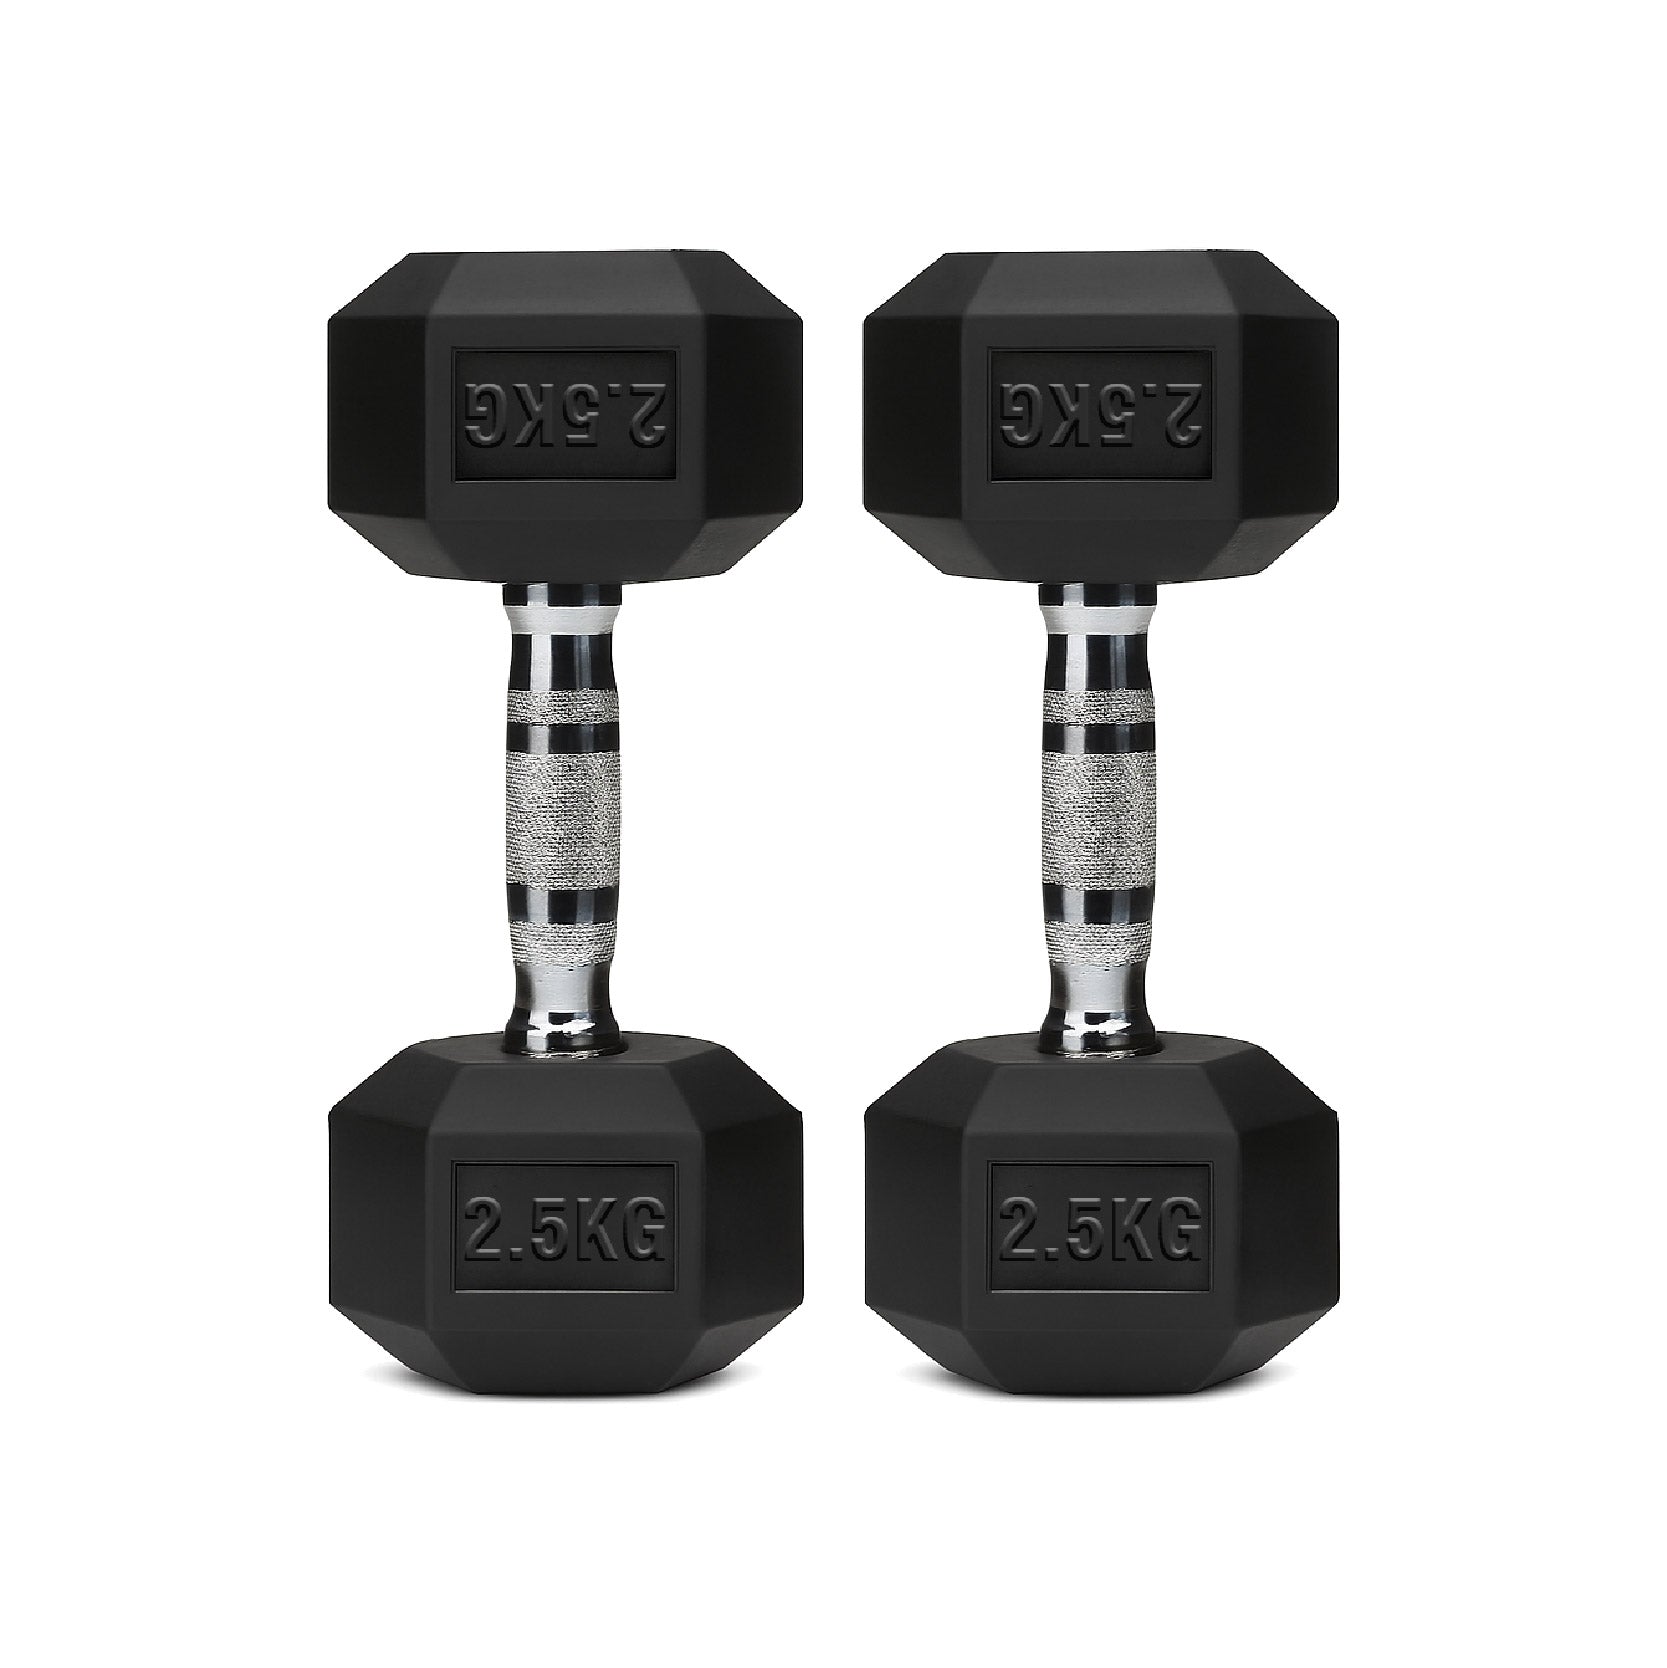
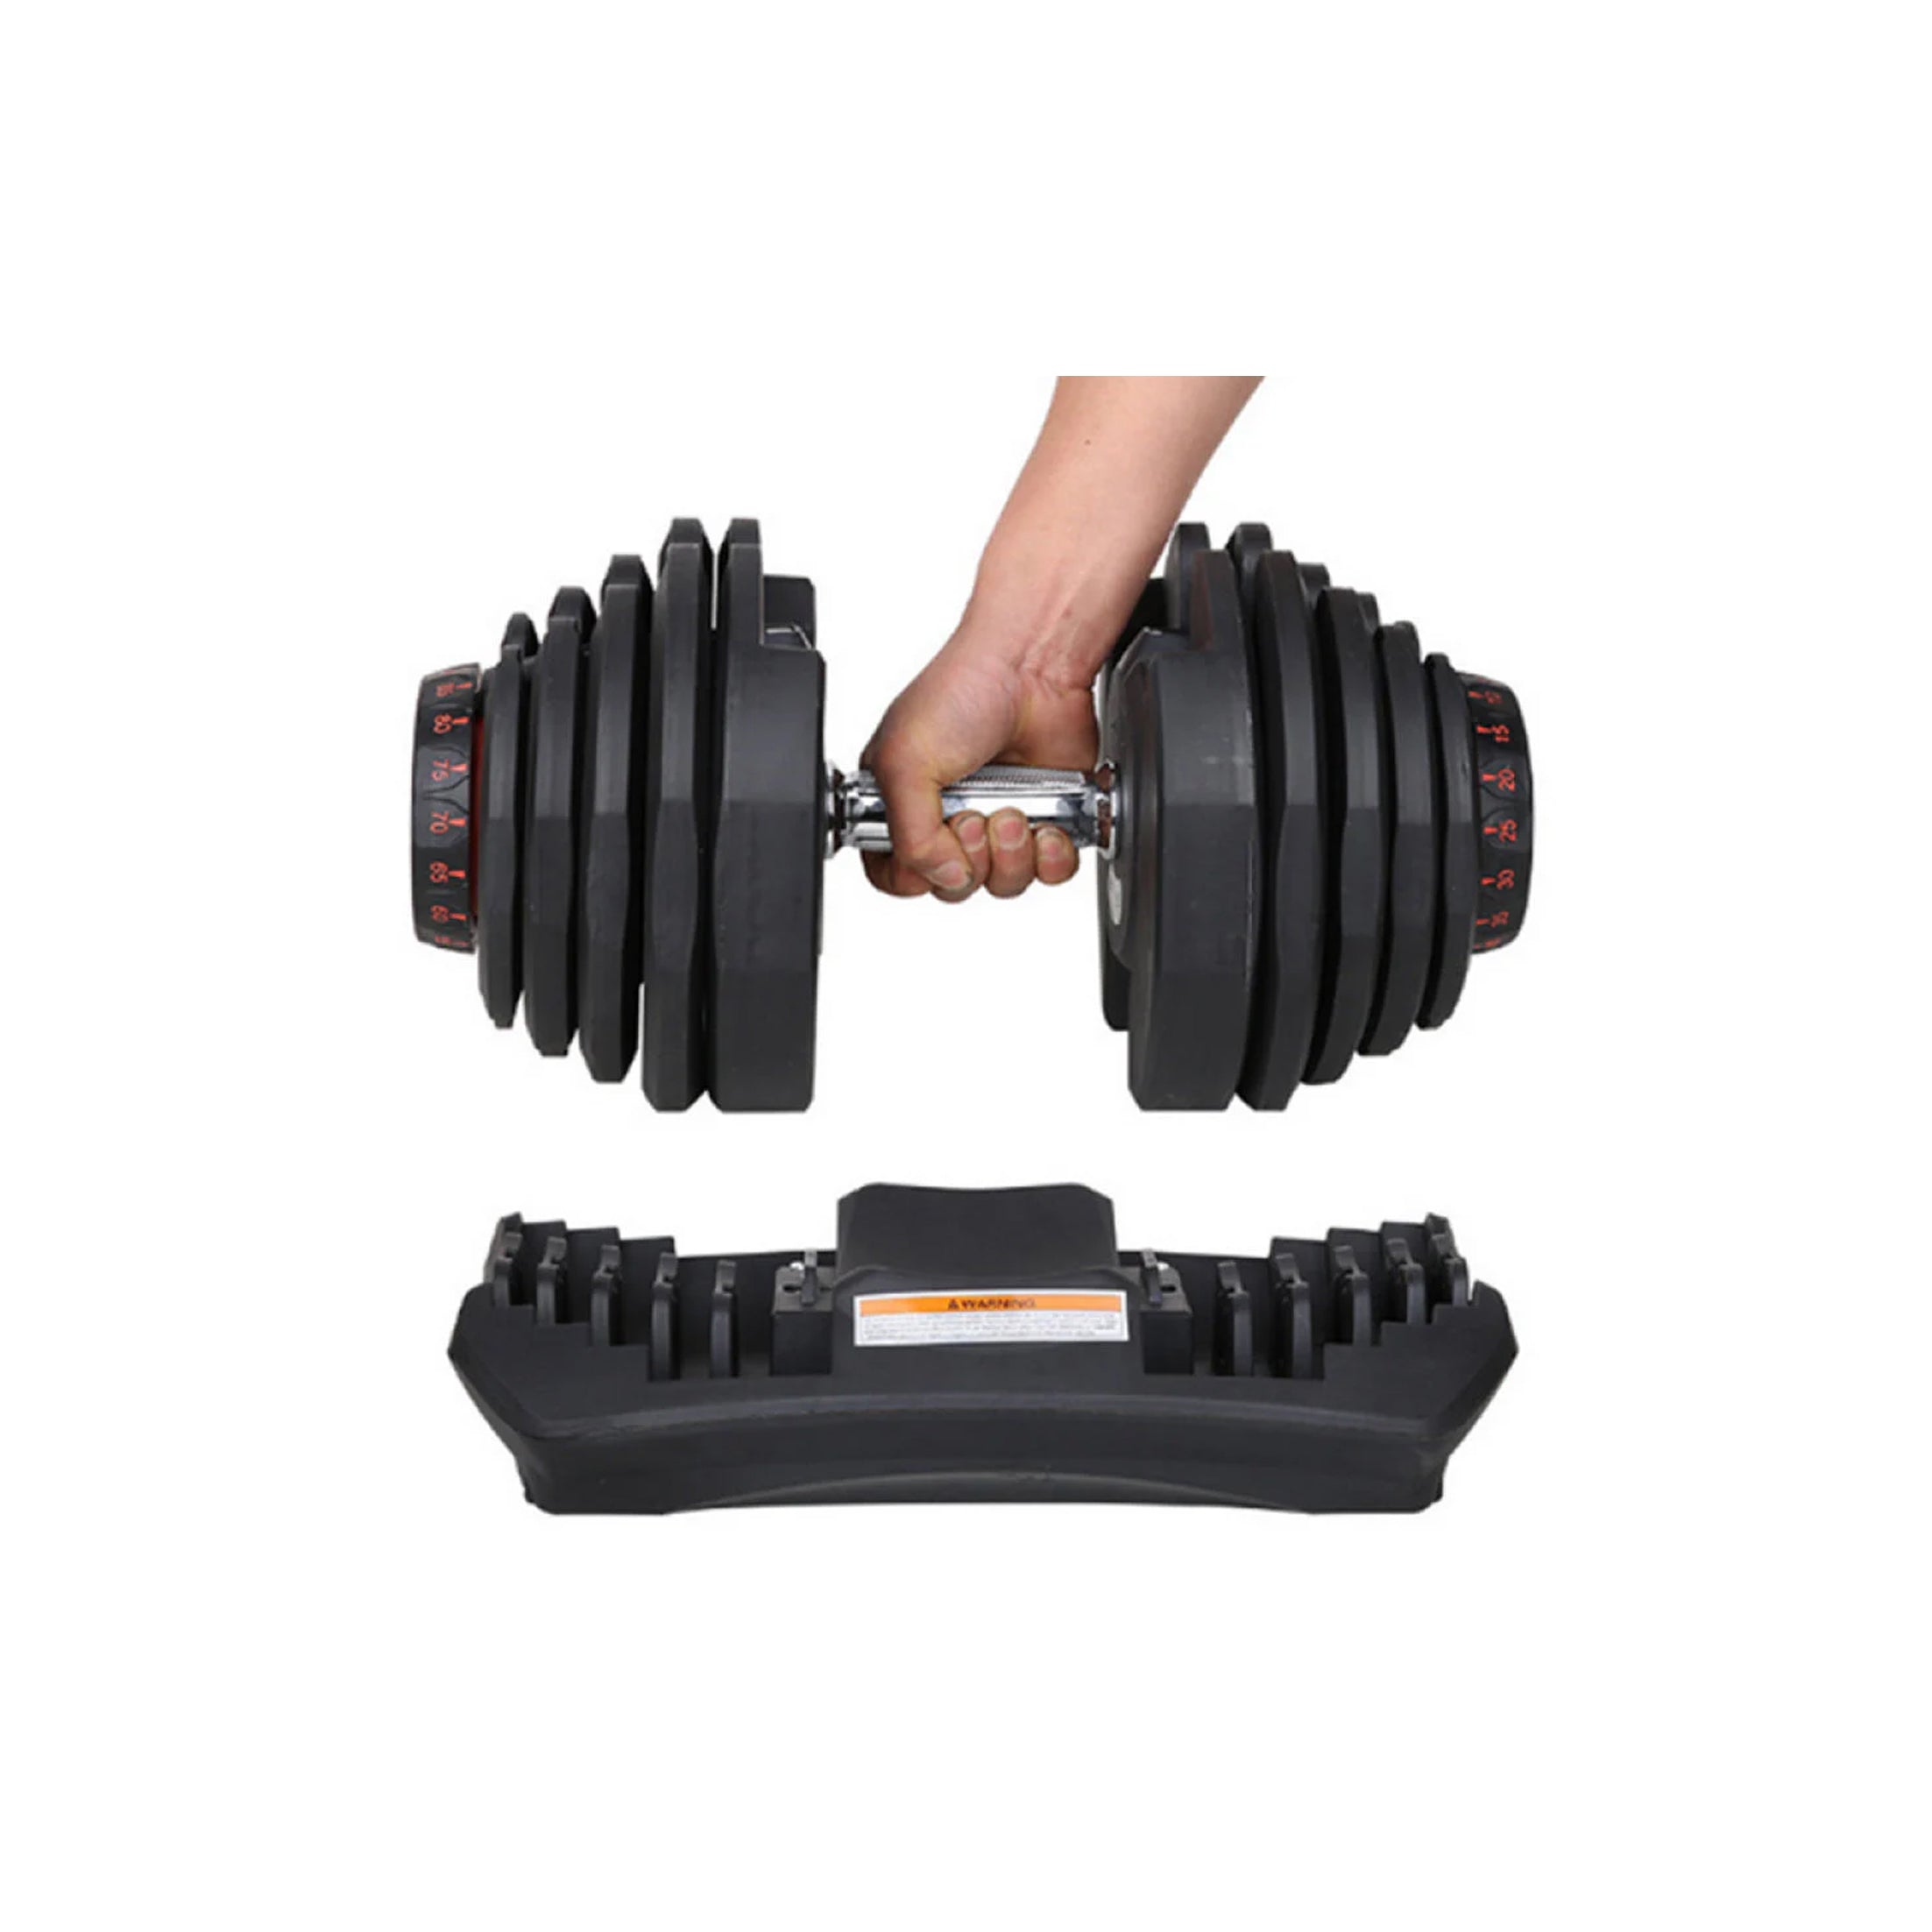
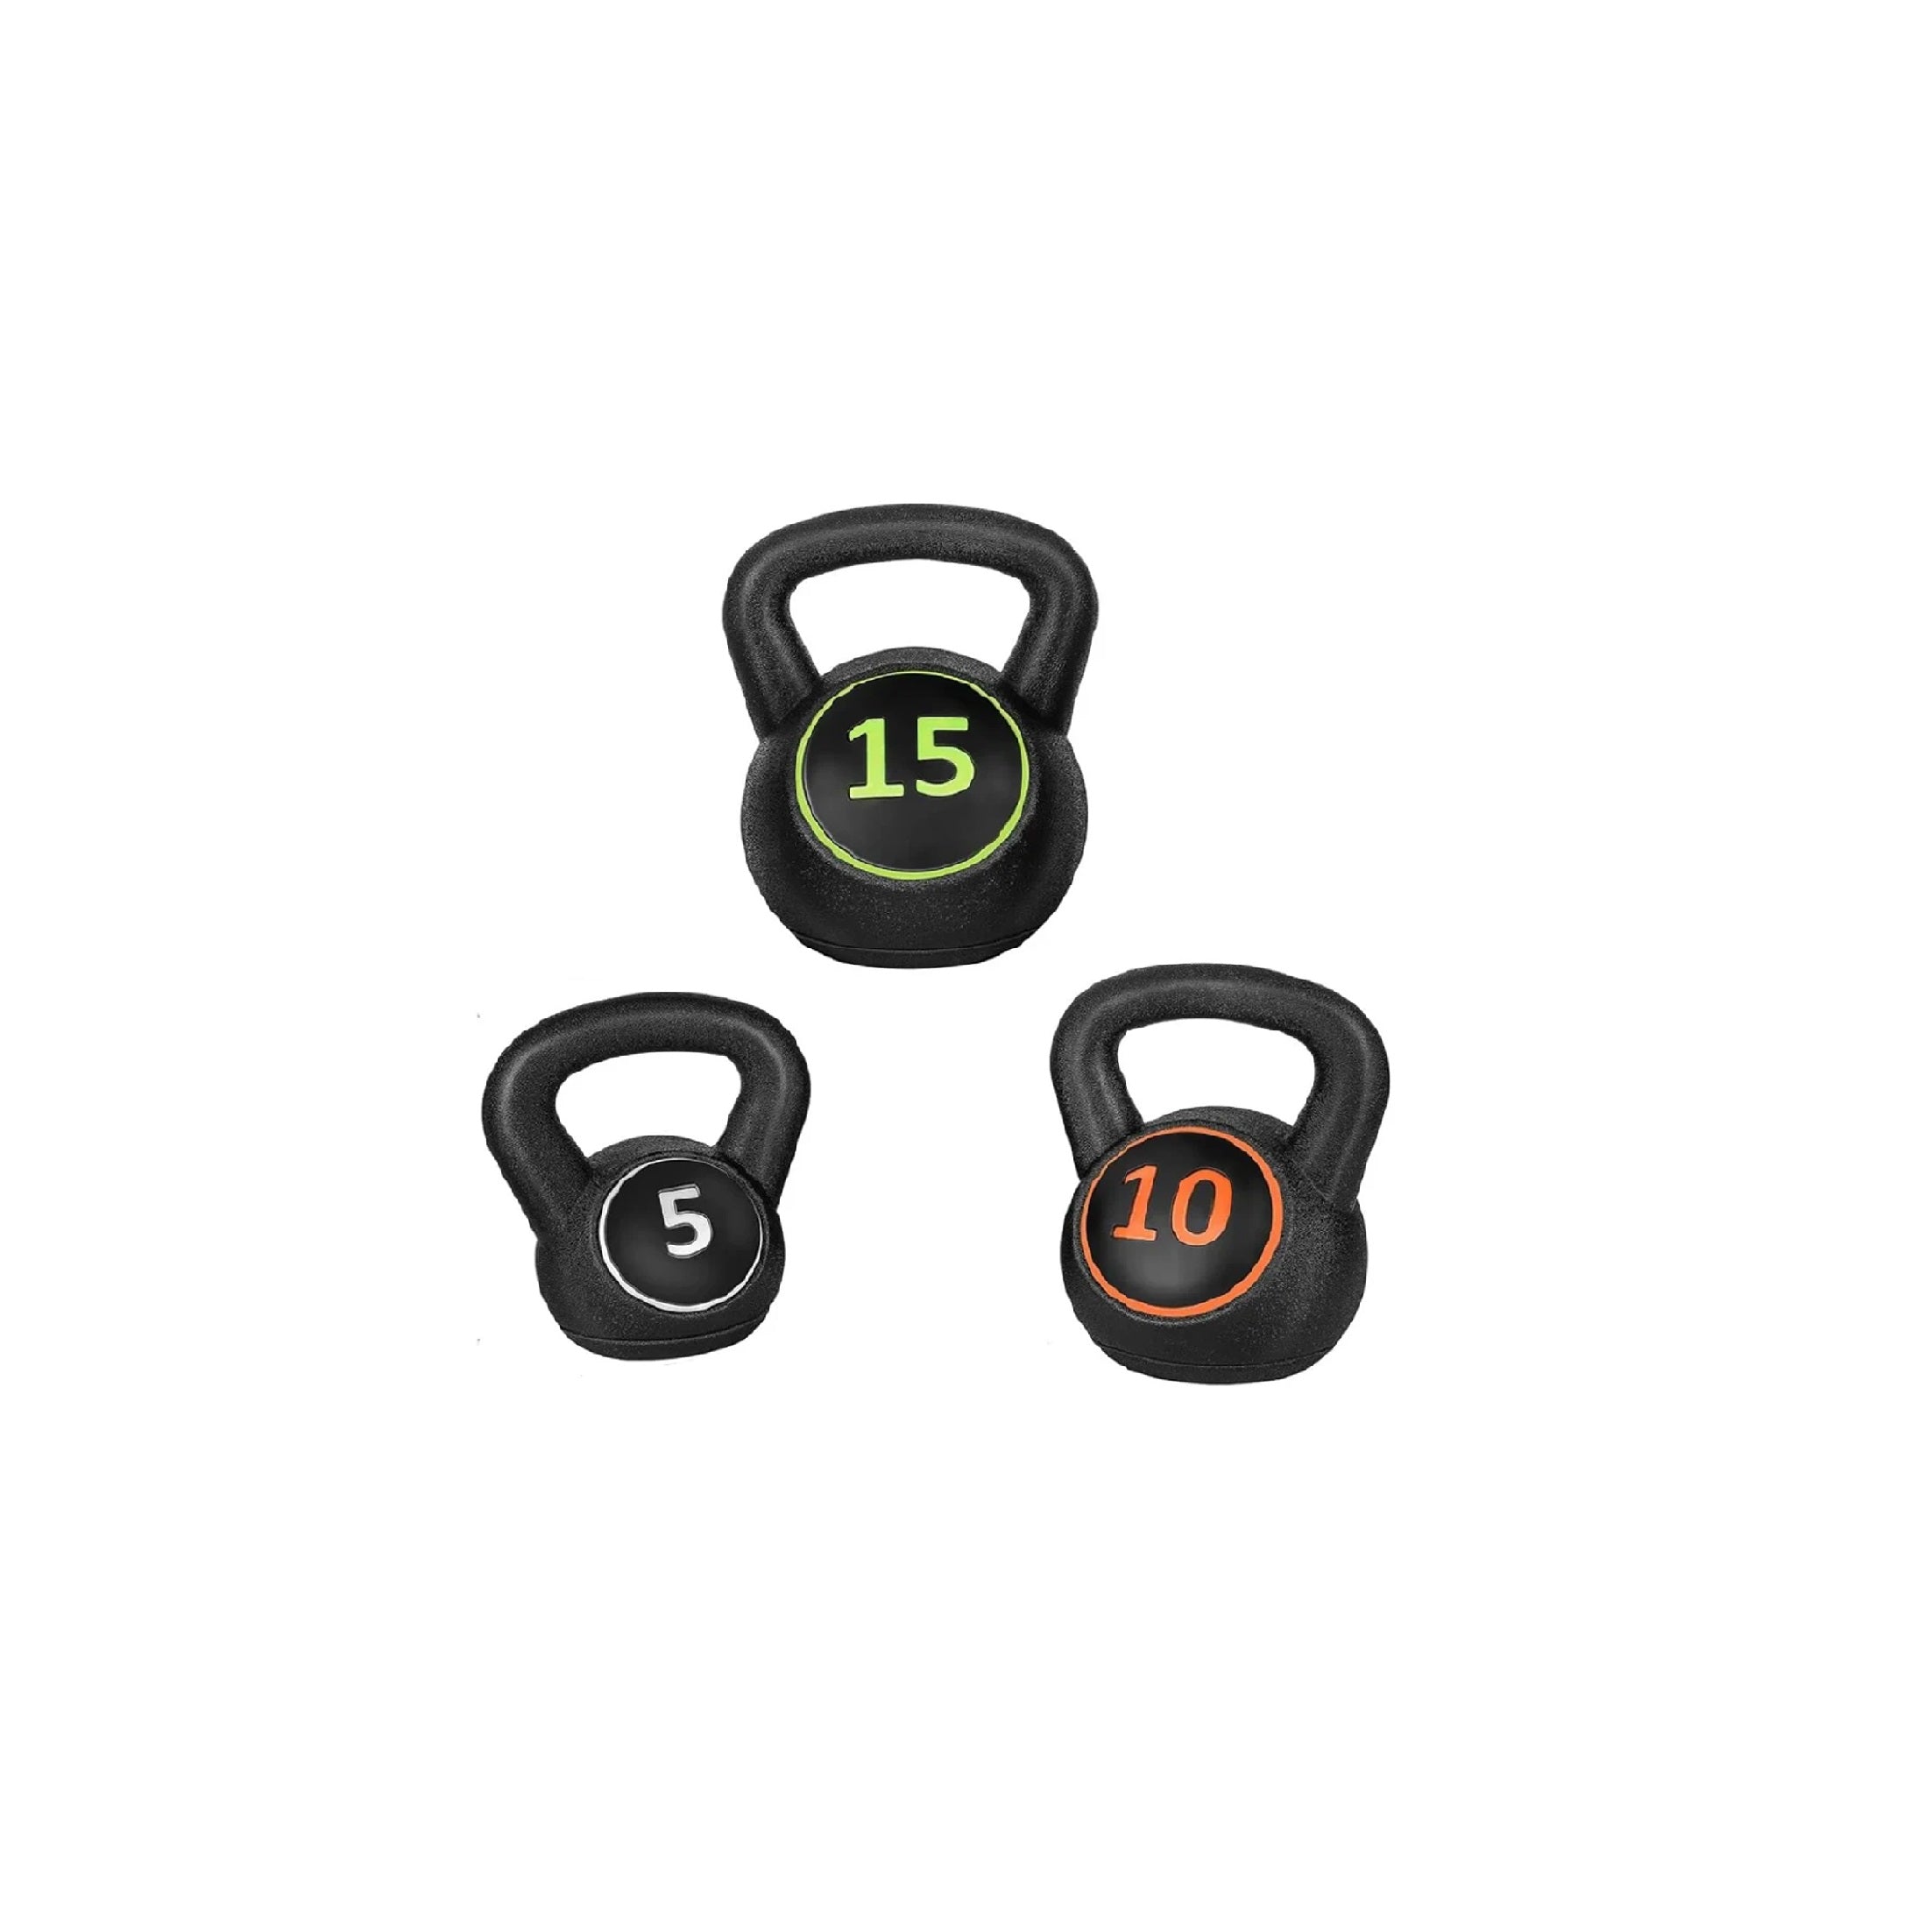
Weightlifting/CrossFit: If you are lifting heavy, using kettlebells, or dropping barbells, you need rubber gym floor mats. You need a surface that won't compress or tear. Yoga/Pilates/Bodyweight: If your routine is low-impact and involves lying on the floor, foam is likely the better choice for comfort. Mixed Use: If you do a bit of everything, rubber is generally the safer bet. You can always lay a yoga mat on top of a rubber floor for extra cushion, but you cannot make a foam floor durable enough for heavy weights. 2. Where is the gym located? If you are setting up in a garage or shed, rubber is ideal because it insulates against cold concrete and withstands temperature fluctuations better. For an upstairs spare bedroom, foam's lightweight nature might be appealing, but rubber provides better sound dampening if you are worried about disturbing people downstairs. 3. Equipment Stability 
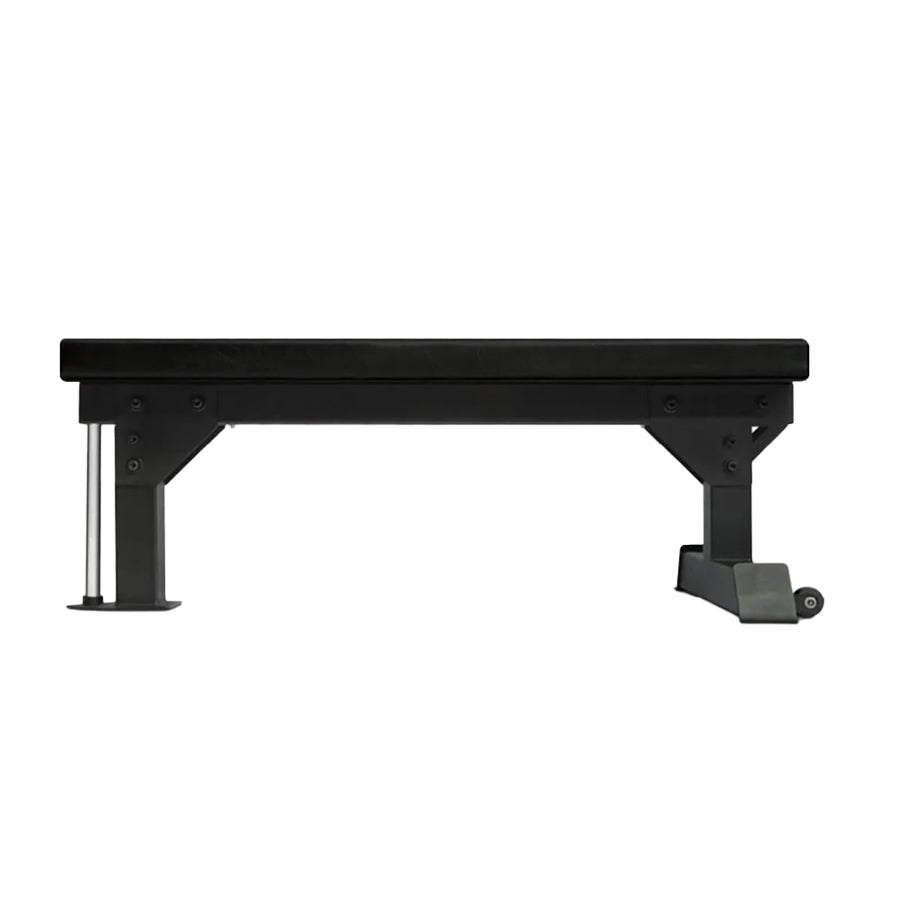
Think about what will sit on the floor. Heavy power racks require a stable base. Putting a rack on soft foam can be dangerous as the foam compresses unevenly, leading to a wobbly structure. Gym floor mat options made of rubber provide a solid, non-compressible base for heavy gear. Choosing the Right Mat for You At Shark Power Gear, we are committed to providing high-quality solutions for fitness enthusiasts across the UK. We know that the foundation of your gym sets the tone for your workouts. When looking for gym floor mats uk based solutions, the verdict usually comes down to intensity. Choose Rubber if you want a professional-grade gym feel, superior durability, and safety for lifting weights. Choose Foam if you want a soft, budget-friendly surface for light exercise, play areas, or stretching zones. For most dedicated home gyms, rubber flooring is the investment that pays off. It turns a spare room or garage into a legitimate training facility. However, understanding your specific needs is the key to satisfaction. Ready to transform your space? Shark Power Gear offers premium flooring options designed to support your fitness journey, rep after rep.

News

Best Gym Floor Mats for Home | UK Guide

by Saqlain Irshad on Dec 13 2025
Setting up a home gym is an exciting step towards achieving your fitness goals. You've probably thought about the weights, the cardio machine, and maybe a bench. But what about the ground beneath your feet? The right gym floor mat is a crucial, yet often overlooked, component of any serious workout space. It protects your floors, your equipment, and even your body. This guide will walk you through everything you need to know about choosing the best gym floor mats for your home in the UK. We'll explore the different types available, what factors to consider before you buy, and how to properly care for your investment. By the end, you'll be able to select the perfect gym mat flooring that fits your space, workout style, and budget. Factors to Consider When Choosing Gym Floor Mats Not all gym mats are created equal. Before you make a purchase, it's important to think about your specific needs. Here are the key factors to consider to ensure you choose the best option for your home gym. Mat Thickness The thickness of the mat is one of the most important considerations. A thicker mat provides more cushioning and protection. 10-20mm: Ideal for general fitness, yoga, and light bodyweight exercises. It offers good cushioning for your joints. 20-30mm: A great all-rounder for most home gyms. This thickness can handle moderate weightlifting and provides a stable base for various exercises. 30mm+: Necessary for heavy-duty weightlifting, like powerlifting or Olympic lifting. This level of thickness absorbs the impact from dropped heavy weights, protecting your subfloor from damage. Material The material of your gym mat flooring affects its durability, shock absorption, and maintenance. Rubber gym floor mats are the industry standard for a reason. High-density rubber is incredibly durable, resistant to wear and tear, and offers excellent shock absorption. It also provides a non-slip surface, which is essential for safety during intense workouts. Size and Coverage Measure your workout area carefully. Will you be covering the entire room or just a specific section? Mats often come in interlocking tiles, which offer flexibility to fit any space. At Shark Power Gear, our tiles come in standard sizes that can be easily trimmed to fit corners and edges, allowing you to create a seamless, professional-looking floor. Ease of Installation For a home gym, you want a flooring solution that is simple to install without needing professional help. Interlocking tiles are perfect for DIY installation. They snap together like puzzle pieces, making the process quick and straightforward. You can have your new gym floor ready in just a few hours. Top Gym Floor Mat Types for Home Use in the UK When it comes to gym mat flooring, rubber is king. At Shark Power Gear, we specialize in high-quality rubber gym floor mats designed to meet the demands of any workout. Heavy-Duty Rubber Gym Mats Our premium heavy-duty rubber gym mats are the ultimate choice for serious lifters and high-impact training. Thickness Options: We offer a range of thicknesses to suit your needs, from 20mm for general use to 40mm for extreme durability and protection. Superior Protection: These mats are designed to absorb the heaviest impacts, making them perfect for deadlifts and other powerful movements. They protect both your equipment and your floor from damage. Durability: Made from high-density rubber, these mats are built to last. They can withstand years of intense use without cracking, curling, or losing their shape. Interlocking Rubber Tiles For a versatile and easy-to-install option, our interlocking rubber tiles are an excellent choice. Customizable: The interlocking design allows you to create a custom-fit floor for any room size or shape. Easy Installation: No adhesive is required. Simply lay them down and connect the edges for a secure, stable surface. Portability: If you ever need to move your gym, you can easily disassemble and transport the tiles. Benefits of Using Gym Floor Mats Investing in quality floor matting for a gym offers several significant advantages that enhance your workout experience and protect your home. Protects Your Floors This is the most obvious benefit. Dropping a dumbbell or kettlebell can easily crack tiles, dent hardwood, or damage carpet. A thick rubber mat acts as a barrier, absorbing the impact and keeping your floors in pristine condition. Enhances Safety Workouts can get intense, and sweat can make surfaces slippery. Our rubber gym floor mats provide a non-slip surface that offers excellent grip, reducing the risk of slips and falls. The cushioning also helps to reduce the strain on your joints during high-impact exercises like jumping or running. Reduces Noise Lifting heavy weights can be a noisy affair. Rubber mats significantly dampen sound, which is a huge plus if you live with others or in an apartment building. You can work out at any time without disturbing your family or neighbours. Improves Equipment Longevity Dropping weights on a hard surface is not just bad for the floor; it's also bad for your equipment. The shock can damage barbells, dumbbells, and weight plates over time. A rubber floor provides a forgiving surface that helps to extend the life of your valuable gym gear. Installation and Maintenance Tips Once you've chosen your mats, proper installation and care will ensure they last for years. Installation Clean the Subfloor: Before you begin, make sure the floor underneath is clean, dry, and level. Start from a Corner: Begin laying the tiles from one corner of the room and work your way out. Interlock the Tiles: Firmly press the interlocking edges together. You can use a rubber mallet to gently tap them into place for a snug fit. Trim to Fit: When you reach the edges of the room, use a sharp utility knife and a straight edge to trim the tiles for a perfect fit. Maintenance Maintaining your rubber gym floor mats is simple. Regular Cleaning: Sweep or vacuum the floor regularly to remove dust and debris. Wipe Up Spills: Clean up any spills immediately with a damp cloth. Deep Cleaning: For a deeper clean, use a mop with a pH-neutral cleaner and water. Avoid using harsh chemicals or solvents, as they can damage the rubber. Where to Buy Gym Floor Mats in the UK For the best selection of high-quality gym floor mats in the UK, look no further than Shark Power Gear. We are dedicated to providing fitness enthusiasts with durable, reliable, and affordable equipment to build the ultimate home gym. All our products are designed and sold for the UK market, so you can be confident you're getting flooring that meets local standards. Build Your Foundation Choosing the right gym floor mat is a foundational step in creating a safe, effective, and enjoyable home workout space. By considering factors like thickness, material, and size, you can select the perfect flooring to match your training style. With the protection, safety, and noise reduction they provide, high-quality rubber mats are an investment that will pay dividends for years to come. Ready to build your perfect home gym from the ground up? Explore our full range of rubber gym floor mats at Shark Power Gear and find the ideal solution for your fitness journey.

News

Your 15-Minute Push-Up Bar Routine for a Stronger Upper Body

by Saqlain Irshad on Nov 24 2025
Finding time for a full workout can be a challenge. If you're looking to build upper body strength without spending hours in the gym, a quick and effective home routine is the answer. Push-up bars are a simple, affordable piece of equipment that can elevate your fitness game, even if you only have 15 minutes to spare. This guide will show you how to add push-up bars to your daily fitness routine. You'll learn about their benefits, how to choose the right pair, and how to perform a complete 15-minute push-up bar routine designed to build strength and improve your form. By the end of this post, you'll have a powerful workout you can do anywhere. Why Use Push-Up Bars? While traditional push-ups are a fantastic bodyweight exercise, push-up bars offer several key advantages that can make your workout safer and more effective. Reduced Wrist Strain: One of the most common complaints about push-ups is wrist pain. When you place your hands flat on the floor, your wrists are forced into an extended position, which can cause discomfort and even lead to injury over time. Push-up bars allow you to maintain a neutral wrist position, similar to holding a dumbbell, significantly reducing strain. Increased Range of Motion: The elevated handles allow you to go deeper into the push-up, lowering your chest further than you could with your hands on the floor. This increased range of motion engages your chest, shoulder, and tricep muscles more intensely, leading to better muscle activation and growth. Improved Form and Stability: The design of push-up bars promotes better form by encouraging a straight line from your head to your heels. They also challenge your stabiliser muscles in your shoulders and core as you work to maintain balance, leading to a more comprehensive workout. Choosing the Right Push-Up Bars When looking for the best pushup bar in the UK, you want a product that is stable, comfortable, and durable. The 2x Push Up Bars are an excellent choice for both beginners and experienced fitness enthusiasts. Currently priced at just £12.99, these bars are designed for performance and value. Key features include: Ergonomic Comfort Handles: The angled, soft-grip foam handles are designed to protect your wrists and provide a comfortable, secure grip. Anti-Slip Rubber Feet: These bars stay put on any surface, whether it's a wooden floor, tile, or carpet, ensuring a safe and stable workout. Heavy-Duty Build: Made from toughened materials, they are strong enough for intense sessions but still lightweight and portable, making them perfect for a home gym or taking on the go. With these features, the Shark Power Gear bars provide the stability and comfort you need to focus on your form and get the most out of every repetition. Your 15-Minute Push-Up Bar Routine This routine is designed to be a quick, full-body workout that you can easily fit into your day. Remember to focus on controlled movements and proper form throughout. Warm-Up (2 minutes) Get your muscles ready for action to prevent injury. Arm Circles: 30 seconds forward, 30 seconds backward. Torso Twists: 30 seconds of gentle twisting from side to side. Jumping Jacks: 30 seconds to get your heart rate up. The Workout (10 minutes) Perform each exercise for 45 seconds, followed by 15 seconds of rest. Complete two full rounds. Round 1 & 2: Standard Push-Ups (45 sec): Place the bars shoulder-width apart. Grip the handles, extend your legs back into a plank position, and keep your body in a straight line. Lower your chest towards the floor, going as deep as you comfortably can, then push back up to the starting position. L-Sits (45 sec): Place the bars on either side of your hips. Sit on the floor with your legs straight out in front of you. Press down into the handles to lift your hips off the floor. Hold this position, engaging your core and triceps. For a greater challenge, try to lift your feet off the ground as well. Wide Push-Ups (45 sec): Move the bars wider than shoulder-width. This variation places more emphasis on your chest muscles. Perform the push-up as you did in the standard position. Mountain Climbers (45 sec): Get into a plank position with your hands on the push-up bars. Drive one knee towards your chest, then quickly switch to the other leg, as if you're running in place. Keep your core tight and your back flat. Narrow (Tricep) Push-Ups (45 sec): Place the bars closer together, directly under your shoulders. Keep your elbows tucked in close to your body as you lower and raise yourself. This position targets your triceps more directly. Cool-Down (3 minutes) Stretching after your workout helps improve flexibility and aids muscle recovery. Chest Stretch: Stand in a doorway and place your forearms on the frame, with your elbows slightly below shoulder height. Step forward gently until you feel a stretch in your chest. Hold for 30 seconds. Tricep Stretch: Raise one arm overhead, bend your elbow, and let your hand fall behind your head. Use your other hand to gently pull the elbow back. Hold for 30 seconds on each side. Wrist Stretches: Extend one arm with your palm facing up. With your other hand, gently pull your fingers down towards the floor. Hold for 30 seconds, then repeat with your palm facing down. Switch arms. Tips for Progression As you get stronger, you'll need to make your workouts more challenging to continue seeing results. Increase Reps: Try to fit more repetitions into each 45-second interval while maintaining good form. Add a Third Round: If you have more time and energy, add another round to your workout for a total of 15 minutes of exercise. Elevate Your Feet: Place your feet on a low stool or step to perform incline push-ups. This increases the resistance and places more emphasis on your upper chest and shoulders. Try Advanced Variations: Experiment with different push-up variations, such as staggered push-ups (one hand forward, one back) or archer push-ups. Safety First While push-up bars are generally safe, it's important to keep a few things in mind: Start Slow: If you're new to push-ups, begin with fewer reps or perform them on your knees to build foundational strength. Listen to Your Body: Never push through sharp pain. If something doesn't feel right, stop and rest. Ensure Stability: Always check that your push-up bars are on a flat, stable surface before starting your workout. Transform Your Upper Body Workouts A 15-minute push-up bar routine is a highly effective way to build upper body strength, improve your core stability, and enhance your overall fitness. By investing in a quality pair of bars like the 2x Push Up Bars from Shark Power Gear, you can make your workouts safer and more efficient. Give this routine a try and discover how much you can achieve in just 15 minutes a day.

News

Best Home Gym Equipment Under £30 in the UK

by Saqlain Irshad on Nov 24 2025
Finding the space and budget for a home gym can be a challenge. Not everyone has a spare room or hundreds of pounds to spend on bulky equipment. But what if you could get a great workout without either? Compact, affordable home gym tools make it possible to stay fit, even in the smallest of spaces. They prove that you don’t need a full-scale gym to achieve your fitness goals. This guide will walk you through the top five compact home gym tools you can buy in the UK for under £30. We'll explore why each piece of equipment is a great investment for your fitness journey. You'll discover how these simple tools can help you build strength, improve cardio, and enhance your overall health, all from the comfort of your home. 1. Push-Up Bars Push-ups are a fundamental bodyweight exercise, but they can put a lot of strain on your wrists. That’s where push-up bars come in. They are our top pick for the best home gym equipment under £30 UK  because they make the exercise more effective and safer. Why We Rate Them Wrist Protection: Push-up bars keep your wrists in a neutral position, reducing the hyperextension that often causes pain and discomfort. This allows you to focus on your form and get more out of every rep. Deeper Range of Motion: The elevated position lets you go deeper into the push-up, increasing the stretch and contraction of your chest, shoulder, and tricep muscles. This leads to better muscle activation and faster results. Portability: They are incredibly lightweight and compact, making them easy to store or take with you when you travel. Shark Power Gear offers a fantastic set of 2x Push Up Bars for just £12.99. These bars feature ergonomic comfort handles and anti-slip rubber feet, ensuring stability on any surface. Made from a heavy-duty, lightweight build, they are perfect for both beginners and seasoned fitness enthusiasts looking for the best pushup bar in the UK. 2. Resistance Bands Resistance bands are a must-have for any home gym. They are incredibly versatile, allowing you to perform a wide range of exercises that target every major muscle group. From squats and lunges to bicep curls and shoulder presses, the possibilities are nearly endless. Why We Rate Them Full-Body Workout: With a single set of bands, you can train your legs, glutes, chest, back, arms, and core. Variable Resistance: They often come in sets with different resistance levels, allowing you to progress as you get stronger. Joint-Friendly: Unlike free weights, resistance bands provide constant tension throughout the movement without putting excess stress on your joints. 3. Jump Rope Don't underestimate the power of a simple jump rope. It’s one of the most effective and efficient cardio tools available. Jumping rope can burn a significant number of calories in a short amount of time, making it perfect for those with a busy schedule. Why We Rate Them Excellent for Cardio: Just a few minutes of jumping rope can get your heart rate up, improving cardiovascular health and endurance. Improves Coordination: It requires a good sense of timing and coordination, enhancing your agility and balance. Extremely Compact: A jump rope takes up virtually no space and can be used almost anywhere. 4. Ab Roller If you’re looking to build a strong, stable core, an ab roller is an excellent choice. This simple wheel with handles is designed to challenge your abdominal muscles, obliques, and lower back in a way that crunches and sit-ups can't. Why We Rate Them Intense Core Workout: The rolling motion engages your entire core, helping you build strength and stability from your shoulders to your hips. Targets Multiple Muscles: While primarily a core exercise, the ab roller also works your shoulders, arms, and back. Affordable and Effective: It’s a low-cost tool that delivers high-impact results for your midsection. 5. Hand Grips Often overlooked, hand grips are a fantastic tool for building forearm strength and improving your grip. A strong grip is essential for lifting heavier weights in other exercises like pull-ups and deadlifts, making this a valuable addition to your fitness toolkit. Why We Rate Them Builds Forearm Strength: Regularly using hand grips will increase the strength and endurance of your forearm muscles. Improves Grip: A stronger grip translates to better performance in a wide range of strength training exercises. Great for Rehabilitation: They can also be used for rehabilitation purposes to recover from hand or wrist injuries. Start Your Home Fitness Journey Building a home gym doesn't have to be expensive or complicated. With these five compact and affordable tools, all available for under £30, you have everything you need to get a fantastic workout without leaving your house. From the muscle-building power of the 2x Push Up Bars to the cardio benefits of a jump rope, each item offers a unique way to help you reach your fitness goals. Investing in your health is one of the best decisions you can make. Start small, stay consistent, and watch as you build a stronger, healthier version of yourself.

News

Push-Up Bars: Safer for Wrists & Shoulders | Shark Power Gear UK

by Saqlain Irshad on Nov 24 2025
The push-up is a fundamental exercise for building upper body and core strength. It's effective, requires no equipment, and can be done anywhere. However, many people experience wrist or shoulder pain when performing traditional push-ups. This is where push-up bars come in, offering a simple yet effective solution to make your workout safer and more productive. For fitness enthusiasts in the UK, especially in places like Runcorn, finding the right equipment to support your home workouts is key. This post will explore why push-up bars are a fantastic addition to your routine. We'll break down the risks of standard push-ups and explain how using bars can protect your joints, enhance muscle engagement, and improve your overall form. The Anatomy of a Push-Up and Its Risks To understand why push-up bars are beneficial, we first need to look at the mechanics of a traditional push-up. When you place your hands flat on the floor, your wrists are forced into a position of extreme extension or dorsiflexion. For many, this unnatural angle places significant stress on the wrist joint, ligaments, and surrounding tendons. Over time, this can lead to discomfort, inflammation, and even chronic push-up bars wrist pain. This wrist strain often leads to a chain reaction. To compensate for the discomfort, you might alter your form, which can shift the load unevenly to your shoulders. This compensation can cause your shoulders to shrug up towards your ears or roll forward, leading to improper muscle activation and potential impingement in the shoulder joint. Without proper stability, the push-up becomes less effective and the risk of injury increases. Benefits of Using Push-Up Bars Incorporating a simple tool like 2x push up bars can transform your workout by addressing these common issues. Here’s how they provide a safer and more effective exercise experience. Reduced Wrist Strain The primary benefit of push-up bars is the improved wrist position. By gripping the handles, your wrists remain in a straight, neutral alignment, similar to how you would hold a dumbbell. This position eliminates the extreme backward bend required in a traditional push-up, significantly reducing the pressure on your wrist joints. It allows for a more direct transfer of force through your forearms, making the movement more comfortable and sustainable, especially for those prone to wrist pain. Enhanced Shoulder Engagement and Range of Motion Push-up bars elevate your hands off the floor, which allows for a greater range of motion. This means you can lower your chest further towards the ground, creating a deeper stretch and contraction in your pectoral muscles. This increased depth not only targets the chest more effectively but also promotes better engagement of the shoulder muscles. The bars encourage your shoulders to remain stable and properly aligned. The neutral grip helps keep your elbows tucked closer to your body, which activates the lats for better back support and reduces strain on the shoulder joint's delicate rotator cuff muscles. Improved Form and Core Stability Maintaining correct form is crucial for any exercise, and push-up bars can help you achieve just that. The stable base provided by the bars encourages you to keep a straight line from your head to your heels. Because your hands are in a fixed, comfortable position, you can focus more on engaging your core and preventing your hips from sagging. This improved stability leads to a more controlled and effective push-up, ensuring you're working the intended muscles—your chest, shoulders, and triceps—without putting unnecessary stress on other parts of your body. Finding the Best Pushup Bar When looking for the best pushup bar, you'll find a few different types. Some are fixed, while others might rotate to allow for more natural movement. Many, like the ones from Shark Power Gear, come with comfortable foam grips and anti-slip feet. Our 2x Push Up Bars, available for just £12.99, are an excellent choice for anyone in the UK. Based out of Runcorn, we ensure you get top-quality gear with super-fast delivery. These bars are designed for both beginners and pros, offering: Ergonomic Comfort Handles: Soft-grip foam protects your wrists and improves form. Anti-Slip Rubber Feet: Ensures stability on any surface, from carpet to wood flooring. Heavy-Duty Build: They are strong enough for intense workouts but light enough to be portable. These features make them a reliable and effective tool for your home gym, helping you engage more muscles in your chest, arms, shoulders, and core. How to Use Push-Up Bars Correctly Getting started with push-up bars is simple. Follow these steps to ensure you're using them safely and effectively: Placement: Place the push-up bars on the floor, slightly wider than shoulder-width apart. Ensure they are on a stable, flat surface. Grip: Grasp the handles firmly with your palms facing each other (a neutral grip). Your wrists should be straight and aligned with your forearms. Positioning: Extend your legs back into a plank position, balancing on the balls of your feet. Your body should form a straight line from your head to your heels. Engage your core to prevent your lower back from arching or your hips from sagging. The Descent: Slowly lower your body by bending your elbows. Keep your elbows tucked relatively close to your body (about a 45-degree angle). Lower yourself until your chest is just below the level of the handles, taking advantage of the increased range of motion. The Ascent: Push through the handles to press your body back up to the starting position. Fully extend your arms at the top without locking your elbows. Focus on squeezing your chest muscles as you push up. Repeat for your desired number of repetitions, always prioritising smooth, controlled movements over speed. Upgrade Your Workout for Healthier Joints Push-up bars are more than just an accessory; they are a valuable tool for making one of the best bodyweight exercises safer and more effective. By protecting your wrists from strain and enabling better shoulder mechanics, they allow you to focus on building strength and endurance without risking injury. If you’re in Runcorn or anywhere else in the UK and looking to enhance your home workouts, consider giving push-up bars a try. For just £12.99, you can invest in your joint health and take your push-up game to the next level. Ready to make your push-ups safer and stronger? Check out the Shark Power Gear 2x Push Up Bars today and experience the difference for yourself.
Are Push-Up Bars Worth It? UK Fitness Expert Reviews 2024

News

Are Push-Up Bars Worth It? UK Fitness Expert Reviews 2024

by Saqlain Irshad on Sep 16 2025
Push-up bars might look like simple fitness accessories, but they've sparked considerable debate in the UK fitness community. These handles, which elevate your hands during push-ups, promise enhanced workouts and reduced wrist strain. But do they actually deliver on these claims? If you've been browsing fitness equipment online or wandering through sports shops across Britain, you've likely encountered push-up bars marketed as game-changers for your home workout routine. The question remains: are push-up bars worth it, or are they just another piece of equipment that'll gather dust under your bed? This comprehensive guide examines what fitness experts across the UK think about push-up bars, their benefits, potential drawbacks, and whether they deserve a place in your fitness arsenal. We'll cut through the marketing hype to give you the straight facts about these deceptively simple tools. What Are Push-Up Bars and How Do They Work? Push-up bars, also known as push-up handles or stands, are sturdy handles that elevate your hands 4-6 inches off the ground during push-ups. Most models feature ergonomic grips designed to maintain a neutral wrist position, reducing the awkward bend that occurs when performing push-ups flat on the floor. The concept is straightforward: by elevating your hands, you create additional space between your chest and the floor, allowing for a deeper range of motion during each repetition. This seemingly small adjustment can significantly impact the effectiveness of your workout. Popular models like 2x Push Up Bars have gained traction in the UK market, offering various designs from basic plastic handles to premium steel constructions with foam grips. The Science-Backed Benefits of Push-Up Bars Enhanced Range of Motion The primary advantage of push-up bars lies in the increased range of motion they provide. Dr. Sarah Mitchell, a sports physiologist based in London, explains: "When your hands are elevated, you can lower your chest further than you would during a standard floor push-up. This extended range of motion leads to greater muscle activation, particularly in the chest and shoulders." Research published in the Journal of Strength and Conditioning Research supports this claim, showing that exercises performed through a fuller range of motion typically result in greater muscle growth and strength gains. Significant Wrist Pain Reduction Many fitness enthusiasts in the UK abandon push-ups due to wrist discomfort. Push-up bars address this issue by maintaining your wrists in a neutral position rather than the hyperextended angle required for floor push-ups. Manchester-based physiotherapist James Thompson notes: "I regularly recommend push-up bars to clients experiencing wrist pain during bodyweight exercises. The neutral grip position reduces stress on the wrist joints and can make push-ups accessible to people who otherwise couldn't perform them comfortably." Improved Muscle Activation The elevated hand position doesn't just increase range of motion—it also shifts muscle activation patterns. Studies indicate that push-up bars can lead to: Greater chest activation: The deeper stretch at the bottom of the movement engages more muscle fibres Enhanced shoulder stability: The unstable surface requires more stabiliser muscle engagement Improved core activation: Maintaining proper form on elevated handles demands greater core engagement What UK Fitness Experts Really Think The Case for Push-Up Bars Personal trainer and former British Army fitness instructor Mark Davies from Birmingham advocates for push-up bars: "They're one of the most cost-effective upgrades you can make to your home gym. For under £20, you get a tool that can genuinely improve your push-up quality and reduce injury risk." Davies particularly appreciates their versatility: "Beyond standard push-ups, they enable variations like decline push-ups when placed on stairs, or can serve as makeshift parallettes for L-sits and other calisthenics movements." Expert Concerns and Limitations However, not all fitness professionals are uniformly enthusiastic. Leeds-based strength coach Emma Richardson raises some important considerations: "While push-up bars can be beneficial, they're not magic. Poor form on push-up bars is still poor form. If someone can't perform quality push-ups on the floor, bars won't automatically fix their technique." Richardson also points out stability concerns: "Some cheaper models can slide or tip during use, potentially increasing injury risk rather than reducing it." The Verdict from Sports Scientists Dr. Michael Foster, a sports scientist at the University of Edinburgh, offers a balanced perspective: "Push-up bars represent a logical progression tool. They're particularly valuable for individuals looking to increase training difficulty without adding external weight. However, they're not essential—you can achieve similar benefits through push-up variations like deficit push-ups using stable platforms." Proper Usage Tips and Techniques Selecting the Best Pushup Bar When choosing push-up bars in the UK market, consider these factors: Stability: Look for models with wide, non-slip bases. Steel construction typically offers superior stability compared to plastic alternatives. Grip Comfort: Foam or rubber grips reduce hand fatigue during longer sets. Height: Most effective models elevate hands 4-6 inches. Excessive height can compromise form and safety. Portability: If you travel frequently or have limited storage space, consider lightweight, compact designs. Mastering Proper Form Edinburgh-based calisthenics coach Robert Chen emphasises form fundamentals: "The elevated position can tempt people to go too deep too quickly. Start conservatively—lower yourself only until you feel a comfortable stretch in your chest, then gradually increase depth as flexibility improves." Key form points include: Hand placement: Slightly wider than shoulder-width, with handles aligned under your chest Controlled descent: Lower yourself slowly over 2-3 seconds Full range: Push up until arms are fully extended, but don't lock elbows aggressively Core engagement: Maintain a straight line from head to heels throughout the movement Progressive Training Approach Start with standard push-ups on the bars, focusing on form over quantity. As strength and flexibility improve, experiment with variations: Wide-grip push-ups: Place bars wider apart to target outer chest Diamond push-ups: Position bars close together for triceps emphasis Single-arm push-ups: Use one bar for advanced unilateral training Decline variations: Elevate feet on a chair or sofa for increased difficulty Incorporating Push-Up Bars into Your Routine For Beginners If you're new to push-ups or returning after a break, push-up bars can make the exercise more accessible. The improved wrist position allows you to focus on building strength without joint discomfort. Start with 3 sets of 5-8 repetitions, emphasising controlled movement over speed. As strength improves, gradually increase repetitions before advancing to more challenging variations. For Intermediate Trainees Those comfortable with bodyweight push-ups can use bars to increase training intensity. The enhanced range of motion provides a fresh stimulus for continued progress. Try incorporating push-up bars into circuit training or as part of upper body supersets. The increased difficulty may initially reduce your rep count—this is normal and temporary. For Advanced Athletes Advanced trainees can leverage push-up bars for specialised applications: Pre-exhaustion: Use deep push-ups to fatigue muscles before weight training Active recovery: Light sets with full range of motion promote blood flow on rest days Movement preparation: The deep stretch serves as dynamic warm-up for pressing movements Are Push-Up Bars Worth the Investment? After examining expert opinions and scientific evidence, the answer depends on your specific circumstances and goals. Push-up bars are worth it if you: Experience wrist pain during floor push-ups Want to increase push-up difficulty without adding weight Have limited space but want versatile exercise equipment Are building a comprehensive home gym setup You might skip push-up bars if you: Already perform push-ups comfortably without wrist issues Prefer barbell and dumbbell training over bodyweight exercises Have very limited budget for fitness equipment Lack storage space for additional gear The relatively low cost of quality push-up bars (typically £15-30 in the UK) makes them a low-risk investment for most fitness enthusiasts. Even if you use them occasionally, they can provide value as a tool for exercise variety and injury prevention. Making the Right Choice for Your Fitness Journey Push-up bars occupy a unique position in the fitness equipment landscape. They're not revolutionary, but they don't claim to be. Instead, they offer a simple, effective solution to common push-up limitations while providing room for exercise progression. The consensus among UK fitness experts is cautiously positive: push-up bars can enhance your training when used properly, but they're not essential for everyone. If you're curious about their benefits and can afford the modest investment, they're worth trying. The worst-case scenario is owning a versatile tool that occasionally adds variety to your workouts. For those committed to bodyweight training or dealing with wrist issues during push-ups, push-up bars represent a practical solution backed by both expert opinion and scientific principles. Just remember that no equipment can substitute for consistent training and proper form—push-up bars are simply tools to help you achieve both more comfortably.
Push-Up Bar Workout Routine: Complete Guide for UK Fitness

News

Push-Up Bar Workout Routine: Complete Guide for UK Fitness

by Saqlain Irshad on Sep 16 2025
Push-up bars have quietly become one of the most underrated pieces of fitness equipment in UK homes. While flashy gym machines grab attention, these simple tools deliver exceptional results for building chest strength, sculpting triceps, and developing a rock-solid core. This comprehensive guide reveals how to harness the full potential of push-up bar workout routines. You'll discover proper techniques, targeted exercises for different muscle groups, and complete workout plans suitable for every fitness level. Whether you're working out in a cramped London flat or a spacious countryside home, these routines require minimal space but deliver maximum impact. The beauty of push-up bars lies in their simplicity and effectiveness. By elevating your hands above ground level, they increase your range of motion, allowing for deeper muscle engagement than traditional floor push-ups. This enhanced range translates to better muscle activation, improved flexibility, and accelerated strength gains. Why Push-Up Bars Outperform Standard Push-Ups Push-up bars offer several distinct advantages over conventional floor exercises. The elevated position allows your chest to dip below your hands, creating a deeper stretch and greater muscle activation. This increased range of motion targets muscle fibers that standard push-ups often miss. The neutral wrist position provided by push-up bars eliminates the strain many people experience during floor push-ups. This ergonomic benefit makes workouts more comfortable and sustainable, particularly for those with wrist sensitivity or previous injuries. 2x Push Up Bars also engage stabilizing muscles more effectively than floor exercises. The slight instability requires your core, shoulders, and arms to work harder to maintain balance and control throughout each movement. Mastering Proper Push-Up Bar Technique Proper form serves as the foundation for all effective push-up bar exercises. Start by positioning the bars shoulder-width apart, ensuring they're stable and won't slip during your workout. Grip the handles firmly with your palms facing down. Your body should form a straight line from head to heels, with your core engaged and shoulders positioned directly over your hands. Descent Phase: Lower your body slowly and controlled, allowing your chest to dip below the level of your hands. This deeper range of motion maximizes muscle engagement and builds greater strength than shallow repetitions. Ascent Phase: Push through your palms to return to the starting position, maintaining that straight body alignment throughout the movement. Focus on smooth, controlled motions rather than rushing through repetitions. Common mistakes include allowing your hips to sag, flaring your elbows too wide, or rushing through the movement. Each repetition should take 2-3 seconds down and 1-2 seconds up for optimal muscle engagement. Targeted Muscle Development Chest Muscles Push-up bars excel at developing the pectoral muscles through their enhanced range of motion. The deeper stretch activates both the upper and lower portions of your chest more effectively than floor push-ups. Wide-grip variations emphasize the outer chest, while closer hand positions target the inner pectoral muscles. Diamond push-ups on bars create intense inner chest activation while simultaneously challenging your triceps. Triceps Development The triceps receive significant stimulation during all push-up bar exercises, but specific variations can maximize their development. Close-grip positions and diamond formations place primary emphasis on the triceps while maintaining chest engagement. Tricep-focused movements on push-up bars provide superior muscle activation compared to many isolation exercises, making them incredibly efficient for arm development. Core Strength Every push-up bar exercise demands core stability to maintain proper form. Your abdominal muscles, obliques, and lower back work continuously to keep your body aligned throughout each movement. Single-arm variations and unstable surface training intensify core engagement, transforming simple push-ups into comprehensive core strengthening exercises. Beginner Push-Up Bar Routine New to push-up bars? This routine builds foundational strength while teaching proper movement patterns. Week 1-2 Foundation Standard Push-Ups: 3 sets of 5-8 repetitions Incline Push-Ups: 3 sets of 8-12 repetitions (feet on floor, hands elevated) Plank Hold: 3 sets of 20-30 seconds Week 3-4 Progression Standard Push-Ups: 3 sets of 8-12 repetitions Wide-Grip Push-Ups: 2 sets of 6-10 repetitions Diamond Push-Ups: 2 sets of 3-6 repetitions Plank Hold: 3 sets of 30-45 seconds Perform this routine three times per week with at least one rest day between sessions. Focus on perfect form over speed or quantity during these foundational weeks. Intermediate Push-Up Bar Routine Once you've mastered the basics, this intermediate routine introduces new challenges and movement patterns. Upper Body Power Circuit Standard Push-Ups: 4 sets of 12-15 repetitions Wide-Grip Push-Ups: 3 sets of 10-12 repetitions Diamond Push-Ups: 3 sets of 8-10 repetitions Single-Arm Push-Ups (assisted): 2 sets of 3-5 per arm Pike Push-Ups: 3 sets of 6-8 repetitions Core Integration Circuit Mountain Climbers: 3 sets of 20 per leg Push-Up to T-Rotation: 3 sets of 6-8 per side Plank to Push-Up: 3 sets of 8-10 repetitions Alternate between these circuits throughout the week, allowing adequate recovery between intense training sessions. Advanced Push-Up Bar Routine Advanced practitioners can challenge themselves with complex movements and higher training volumes. Strength Endurance Protocol Standard Push-Ups: 5 sets of 20-25 repetitions Explosive Push-Ups: 4 sets of 8-10 repetitions Single-Arm Push-Ups: 3 sets of 5-8 per arm Handstand Push-Ups (wall-assisted): 3 sets of 5-8 repetitions Archer Push-Ups: 3 sets of 6-8 per side Power Development Session Clap Push-Ups: 4 sets of 6-8 repetitions Staggered Push-Ups: 3 sets of 8-10 per position Hindu Push-Ups: 3 sets of 10-12 repetitions One-Arm One-Leg Push-Ups: 2 sets of 3-5 per side Advanced routines should be performed 4-5 times per week, with careful attention to recovery and proper nutrition. Progression Strategies and Injury Prevention Gradual progression prevents plateaus while minimizing injury risk. Increase training difficulty through several methods: adding repetitions, increasing sets, introducing new variations, or combining movements into complex sequences. Progressive Overload Principles Increase repetitions by 1-2 per week until you reach the upper range Add new sets when current volume becomes manageable Introduce harder variations once current exercises feel easy Combine movements for increased complexity and challenge Injury Prevention GuidelinesWarm up thoroughly before each session with arm circles, shoulder rolls, and light cardio. Pay attention to your body's signals and avoid training through pain or excessive fatigue. Maintain proper form even as exercises become challenging. Poor technique under fatigue increases injury risk and reduces training effectiveness. Rest adequately between training sessions, allowing your muscles time to recover and grow stronger. Equipment Considerations for UK Fitness Enthusiasts When selecting the best pushup bar for your home gym, consider build quality, stability, and comfort. Look for bars with non-slip grips and stable bases that won't slide on various floor surfaces common in UK homes. Many UK fitness enthusiasts prefer adjustable or stackable designs that store easily in smaller living spaces. Quality push-up bars should handle your body weight plus the additional force generated during explosive movements. Consider bars with ergonomic grips that accommodate extended training sessions without causing hand discomfort. The investment in quality equipment pays dividends through improved workout consistency and reduced injury risk. Creating Your Perfect Home Gym Routine Success with push-up bar workouts depends on consistency and progressive challenge. Start with routines that match your current fitness level, then gradually increase difficulty as your strength improves. Schedule your workouts at times when you can maintain consistency. Whether that's early morning before work or evening after dinner, regular timing helps establish sustainable habits. Track your progress through workout logs, noting repetitions completed, difficulty levels, and how you feel after each session. This data helps identify when to increase challenge and celebrates your improvement over time. Remember that muscle growth occurs during recovery periods, not just during exercise. Combine your push-up bar workout routine with adequate sleep, proper nutrition, and stress management for optimal results. Push-up bar workout routines offer an efficient, equipment-minimal approach to building impressive upper body and core strength. These versatile tools transform simple movements into comprehensive training sessions that rival expensive gym equipment.
Best Push-Up Bars UK (2025): A Buyer's Guide

News

Best Push-Up Bars UK (2025): A Buyer's Guide

by Saqlain Irshad on Sep 16 2025
Push-ups are a cornerstone of any effective fitness routine, building strength across your chest, shoulders, and arms. But if you’re looking to enhance this classic exercise, reduce wrist strain, and achieve a deeper range of motion, it might be time to invest in a set of push-up bars. This guide will walk you through everything you need to know about finding the best push-up bars in the UK for 2025. We’ll explore the essential features to look for, review top-rated models, and share expert advice to help you make a confident purchase. Whether you're setting up a home gym or just want to level up your workouts, the right pair of bars can make all the difference. What to Look for When Buying Push-Up Bars Choosing the best push-up bars involves more than just picking the first pair you see. To ensure you get a durable and effective product, consider these key features: Stability and Grip: Look for bars with a wide base and non-slip rubber or foam feet. This prevents them from sliding during your workout, which is crucial for safety. The hand grips should also be comfortable and secure, with materials like high-density foam or textured rubber offering a firm hold. Material and Durability: Most push-up bars are made from plastic, metal, or wood. High-quality PVC plastic can be lightweight and affordable, while steel or chrome bars offer superior durability and weight capacity. Wooden bars, often found in calisthenics equipment, provide a premium feel and excellent grip. Ergonomics and Design: A good ergonomic design helps protect your wrists by keeping them in a neutral position. Some bars feature a slight incline or an S-shape to reduce joint pressure. Rotational bars are another option, allowing your hands and wrists to move naturally as you perform the push-up. Portability and Storage: If you have limited space or plan to travel with your equipment, consider lightweight and easily disassembled bars. Some models are compact enough to fit in a gym bag, making them perfect for workouts on the go. Weight Capacity: Always check the maximum user weight the bars can support. Heavy-duty metal bars typically have a higher capacity, making them a safer choice for heavier individuals or those performing weighted push-ups. Different Types of Push-Up Bars The UK market offers a variety of push-up bars, each with unique advantages. Understanding the differences will help you find the best pushup bar for your needs. Stationary Bars (H-Style) These are the most common type of push-up bars. Their simple H-shaped design provides a stable platform for standard push-ups. They are generally affordable, durable, and easy to use, making them a great starting point for beginners. Rotating Push-Up Bars Rotating bars have a circular base that allows the handles to swivel during the exercise. This design mimics the natural movement of your wrists and elbows, engaging more muscles in your chest and shoulders while further reducing joint strain. Multi-Functional or Colour-Coded Systems These are larger boards with multiple slots to place handles, often colour-coded to target specific muscle groups (e.g., chest, shoulders, back, triceps). While less portable, these systems offer incredible versatility for a complete upper-body workout. Wooden Calisthenics Bars (Parallettes) Popular among gymnastics and calisthenics athletes, parallettes are typically made of wood and offer a longer handle. They are excellent for a wide range of bodyweight exercises beyond just push-ups, including L-sits and handstands. Top-Rated Push-Up Bars UK for 2025: Reviews Here’s a look at some of the best push-up bars available in the UK, selected for their quality, performance, and user feedback. 1. The Perfect Fitness Pushup Elite Best For: All-around performance and joint comfort. Why It's Great: These rotating push-up bars are designed to engage more muscles and reduce strain on your joints. Their patented rotation system allows for natural arm and wrist movement. The sturdy, wide base and comfortable grips make them a favourite among fitness enthusiasts. They are a fantastic investment for anyone serious about their push-up form. 2. Adidas Premium Push-Up Bars Best For: Stability and durability. Why It's Great: Known for their robust construction, these steel bars from Adidas offer exceptional stability. The elevated design allows for a deeper range of motion, and the foam-covered handles provide a secure, comfortable grip. They are built to last and can handle intense, daily use. 3. Coresteady Wooden Parallettes Best For: Calisthenics and advanced bodyweight training. Why It's Great: If you're looking for more than just a basic push-up bar, these wooden parallettes from Coresteady are an excellent choice. The premium wood provides a natural grip, and their sturdy build is perfect for exercises like dips, L-sits, and planches. They offer versatility that standard plastic bars can't match. 4. 2x Push Up Bars by PULLUP & DIP Best For: Portability and travel. Why It's Great: These 2x Push Up Bars are incredibly lightweight and can be disassembled for easy storage and transport. Despite their portability, they are surprisingly stable and offer a solid platform for your workouts. They are an ideal companion for anyone who wants to maintain their fitness routine while travelling. How to Choose the Right Bars for You Your fitness goals should guide your decision. For Beginners: Start with a stable, H-style bar. They are affordable, easy to use, and help you master the basic form without straining your wrists. For Muscle Building: Consider rotating bars or a multi-functional system. The added rotation and varied grip positions will challenge your muscles more intensely, promoting greater strength and definition. For Wrist Pain Sufferers: Ergonomic or rotating bars are the best options. They keep your wrists in a neutral position, alleviating the pain often associated with floor push-ups. For Advanced Athletes: Wooden parallettes offer the versatility needed for advanced calisthenics and gymnastic movements, providing a challenge far beyond standard push-ups. Expert Opinions on Push-Up Bars We asked UK-based fitness professionals for their take. James Atherton, a certified personal trainer, notes, "Push-up bars are one of the most underrated pieces of home gym equipment. They allow for a deeper stretch in the pectoral muscles and reduce the hyperextension of the wrist, which is a common cause of injury. I recommend them to nearly all my clients." Another expert, Dr. Sarah Davies, a sports physiotherapist, adds, "For individuals with previous wrist injuries, using a push-up bar can be a game-changer. The neutral grip position significantly lessens the load on the carpal tunnel. Rotating bars can be even more beneficial as they allow for fluid movement through the shoulder and elbow joints." Where to Buy and What to Expect on Price You can find push-up bars at most major UK sports retailers, including Sports Direct, Decathlon, and Argos. Online marketplaces like Amazon UK also offer a vast selection. Budget-Friendly (£10 - £20): Basic plastic or PVC H-style bars fall into this category. They are functional but may lack the durability of more expensive models. Mid-Range (£20 - £40): Here you'll find high-quality steel bars and rotating models from reputable brands. This is the sweet spot for most home users, balancing price and performance. Premium (£40+): This range includes advanced multi-functional systems and high-quality wooden parallettes designed for serious athletes. Master Your Fitness Goals Choosing the best push-up bars in the UK for 2025 comes down to understanding your personal needs and fitness goals. Whether you opt for a simple pair of H-style bars to protect your wrists or invest in a rotating set to maximize muscle engagement, you're taking a positive step toward a stronger, healthier upper body. With the market continuing to innovate, we can expect to see even more advanced and ergonomic designs in the future. For now, the options reviewed in this guide represent the best of what's available, offering a reliable path to perfecting one of fitness's most fundamental exercises.
5 Push-Up Bar Exercises for Upper Body Strength

News

5 Push-Up Bar Exercises for Upper Body Strength

by Saqlain Irshad on Sep 16 2025
Looking for a simple yet powerful way to boost your home workouts? Enter the humble push-up bar. This piece of equipment might seem basic, but it's a fantastic tool for building serious upper body strength. Using push-up bars can transform your standard push-up, making it more effective and comfortable. Push-up bars, like the popular 2x Push Up Bars, elevate your hands off the floor. This simple change allows for a greater range of motion, letting you go deeper into the push-up and engaging your chest, shoulder, and tricep muscles more intensely. This deeper movement translates to faster strength gains and better muscle definition. Furthermore, they help protect your wrists by keeping them in a neutral position, reducing the strain that can come from doing push-ups on a flat surface. This guide will walk you through five essential push-up bar exercises you can do at home. From foundational moves to more advanced variations, these exercises will help you build a well-rounded and powerful upper body. Exercise 1: Basic Push-Up with Bars The basic push-up is the foundation of any upper body routine. Using bars for this classic exercise amplifies its benefits by increasing the range of motion and engaging more muscle fibres. How to do it: Place your push-up bars on the floor, about shoulder-width apart. Grip the handles firmly and extend your legs back to get into a high plank position. Your body should form a straight line from your head to your heels. Engage your core to keep your back flat and prevent your hips from sagging. Lower your body by bending your elbows, keeping them close to your sides. Continue until your chest is just below the level of the handles. Pause for a moment at the bottom of the movement. Push back up powerfully to the starting position, fully extending your arms. Complete 3 sets of 8-12 repetitions. Muscles worked: This exercise primarily targets the chest (pectorals), shoulders (deltoids), and triceps. Exercise 2: Diamond Push-Up with Bars For those looking to really target their triceps, the diamond push-up is a must. Using push-up bars for this variation can be more comfortable on the wrists than the traditional floor version. How to do it: Position your push-up bars close together on the floor, forming a diamond or triangle shape with the handles. Grip the bars and get into a high plank position, with your hands directly under your chest. Keeping your core tight and back straight, lower your body towards the bars. Keep your elbows tucked in close to your body. Lower down until your chest nearly touches the bars. Push back up forcefully to the starting position. Aim for 3 sets of 6-10 repetitions. This is a challenging exercise, so focus on form over quantity. Muscles worked: This variation places a strong emphasis on the triceps, while also engaging the chest and shoulders. Exercise 3: Wide-Grip Push-Up with Bars If you want to build a broader chest, the wide-grip push-up is the way to go. Spacing the bars further apart shifts the focus to the outer pectoral muscles. How to do it: Place the push-up bars on the floor wider than shoulder-width apart. The further apart they are, the more challenging the exercise will be on your chest. Assume a high plank position, gripping the bars with your hands. Lower your body towards the floor, allowing your elbows to flare out to the sides. Go as low as you can while maintaining control and good form. Push through your palms to return to the starting position. Complete 3 sets of 8-12 repetitions. Muscles worked: This exercise is excellent for targeting the outer chest muscles and also works the shoulders. Exercise 4: Decline Push-Up with Bars Ready to increase the intensity? The decline push-up is an advanced variation that targets the upper chest and shoulders by elevating your feet. How to do it: Place your push-up bars shoulder-width apart on the floor. Find a sturdy, elevated surface like a bench, box, or step, and place your feet on it. Grip the bars and get into a plank position. Your body should be in a straight line, declining from your feet to your head. Lower your chest towards the floor by bending your elbows. Press back up to the starting position. Aim for 3 sets of 6-10 repetitions. Muscles worked: This challenging exercise emphasizes the upper pectoral muscles and the front deltoids (shoulders). Finding the best pushup bar with a stable base is crucial for safety with this movement. Exercise 5: Incline Push-Up with Bars The incline push-up is a great option for beginners or for those who want to focus on the lower part of the chest. It's less intense than a standard push-up because your upper body is elevated. How to do it: Place your push-up bars on an elevated, stable surface, such as a sturdy box or bench. Position your hands on the bars and your feet on the floor, creating an inclined plank position. Keeping your body straight, lower your chest towards the bars. Push back up to the starting position. Complete 3 sets of 10-15 repetitions. Muscles worked: This variation targets the lower chest muscles and is a good way to build foundational strength before moving on to more difficult push-up variations. Maximize Your Upper Body Workout Incorporating these five push-up bar exercises into your routine is a surefire way to build a stronger, more defined upper body from the comfort of your home. The increased range of motion and reduced wrist strain offered by push-up bars make them an invaluable tool for anyone serious about their fitness. Start with the variations that match your current fitness level and gradually progress as you get stronger. Consistency is key, so aim to include these exercises in your workout plan regularly. By focusing on proper form and challenging yourself, you'll unlock new levels of strength and see significant results.
How to Use Push-Up Bars Correctly: A Beginner's Guide

News

How to Use Push-Up Bars Correctly: A Beginner's Guide

by Saqlain Irshad on Sep 16 2025
Push-ups remain one of the most effective bodyweight exercises for building upper body strength, but traditional floor push-ups can strain your wrists and limit your range of motion. Push-up bars offer an elegant solution to these problems while amplifying the benefits of this classic exercise. Push-up bars are simple fitness tools that elevate your hands during push-ups, creating a deeper range of motion and reducing wrist strain. Popular throughout the UK fitness community, these affordable accessories have transformed how people approach home workouts. Whether you're recovering from a wrist injury or simply want to maximise your push-up potential, understanding proper push-up bar technique can revolutionise your training routine. This comprehensive guide will walk you through everything you need to know about using push-up bars correctly, from selecting the right equipment to mastering advanced variations. By the end, you'll have the knowledge and confidence to incorporate these versatile tools into your fitness journey safely and effectively. Choosing the Right Push-Up Bars The UK fitness market offers various push-up bar options, each designed to meet different needs and budgets. Understanding these differences will help you make an informed decision. Types of Push-Up Bars Fixed Push-Up Bars feature a stable, non-rotating design that provides consistent support throughout your workout. These bars typically have foam or rubber grips and are ideal for beginners who want reliable stability during their exercises. Rotating Push-Up Bars incorporate a swivel mechanism that allows natural wrist movement during the exercise. This design reduces joint stress and can accommodate different hand positions, making them popular among experienced users. Ergonomic Push-Up Bars feature angled or curved handles designed to match the natural position of your wrists and hands. These specialised bars often cost more but provide superior comfort for extended training sessions. Key Features to Consider When shopping for push-up bars in the UK, evaluate the grip quality first. Look for non-slip handles made from durable materials like foam or rubber that won't become slippery during intense workouts. Base stability matters enormously for safety and performance. Quality push-up bars feature wide, non-slip bases that remain secure on various floor surfaces, from carpet to hardwood. Weight capacity should align with your body weight plus any additional resistance you might add later. Most reputable brands clearly state their weight limits, typically ranging from 100kg to 150kg. 2x Push Up Bars represent the standard configuration for most exercises, providing the foundation for proper push-up bar training. This setup allows for balanced upper body development and forms the basis for all the techniques covered in this guide. Proper Form and Technique Mastering push-up bar technique requires attention to positioning, movement patterns, and breathing. These fundamentals ensure maximum benefits of push-up bars while minimising injury risk. Setting Up Your Position Place your push-up bars shoulder-width apart on a flat, stable surface. The bars should align directly under your shoulders when you assume the starting position. This alignment ensures proper weight distribution and optimal muscle engagement. Grip the bars firmly with your palms facing down and fingers wrapped securely around the handles. Your wrists should remain straight and neutral throughout the entire movement—one of the primary advantages of using push-up bars over traditional floor push-ups. Position your feet according to your current fitness level. Beginners can start with feet slightly wider than hip-width for added stability, while advanced users might prefer a narrower stance for increased challenge. The Movement Pattern Begin in the high plank position with your body forming a straight line from head to heels. Engage your core muscles to maintain this alignment throughout the exercise. Lower your body by bending your elbows, allowing them to track at approximately a 45-degree angle from your torso. This angle optimises chest activation while protecting your shoulder joints from excessive stress. Descend until your chest approaches the level of the push-up bars. The increased range of motion provided by the bars allows for a deeper stretch in your chest muscles compared to traditional push-ups. Push through your palms to return to the starting position, focusing on a controlled, steady movement. Avoid rushing the upward phase, as the controlled ascent contributes significantly to strength development. Breathing Technique Coordinate your breathing with the movement for optimal performance. Inhale during the lowering phase, allowing your ribcage to expand naturally. Exhale forcefully during the pushing phase, which helps stabilise your core and provides additional power. Maintain steady breathing throughout your set rather than holding your breath, which can increase blood pressure and reduce performance. Common Mistakes to Avoid Even with the best pushup bar equipment, poor technique can limit results and increase injury risk. Recognising these common errors helps you maintain proper form from the beginning. Wrist and Hand Placement Errors Placing your hands too wide or too narrow disrupts the natural movement pattern and reduces effectiveness. Hands positioned too wide shift emphasis away from the chest toward the shoulders, while hands too close together may cause wrist discomfort. Gripping the bars too tightly creates unnecessary tension in your forearms and can lead to premature fatigue. Maintain a firm but relaxed grip that allows natural hand positioning. Body Alignment Issues Allowing your hips to sag creates an arched back position that places stress on your lower spine. Conversely, raising your hips too high shifts the exercise emphasis toward your shoulders rather than your chest. Letting your head drop or crane forward disrupts spinal alignment and can cause neck strain. Keep your head in a neutral position, with your ears aligned over your shoulders. Movement Execution Problems Bouncing at the bottom of the movement eliminates the muscle-building benefits of the exercise and increases injury risk. Each repetition should include a brief pause at the bottom position to ensure full muscle engagement. Partial range of motion limits the advantages that push-up bars provide. Take advantage of the increased depth by lowering your chest to bar level on each repetition. Progression Mistakes Advancing too quickly to difficult variations before mastering basic technique often leads to form breakdown and potential injury. Build a solid foundation with standard push-up bar exercises before attempting advanced movements. Neglecting warm-up exercises can leave your muscles unprepared for the demands of push-up bar training. Always include dynamic stretches and light movements before beginning your workout. Advanced Techniques and Variations Once you've mastered basic push-up bar technique, these advanced variations can add new challenges and prevent training plateaus. Single-Arm Push-Up Bar Training Single-arm push-ups using one bar dramatically increase the strength and stability demands of the exercise. Begin by practicing the movement with your non-working hand on an elevated surface before progressing to full single-arm repetitions. This variation requires exceptional core strength and shoulder stability. Start with partial range of motion and gradually increase the depth as your strength improves. Plyometric Push-Up Bar Exercises Explosive push-ups using push-up bars add a power component to your training. Push forcefully enough to lift your hands off the bars briefly before landing softly and immediately beginning the next repetition. These exercises require significant upper body strength and should only be attempted after mastering standard push-up bar technique. The increased range of motion from the bars allows for more explosive movement than traditional floor plyometric push-ups. Combination Movements Integrate push-up bars into circuit training by combining them with other bodyweight exercises. Mountain climbers performed with hands on push-up bars increase the core challenge while maintaining the wrist-friendly position. Push-up to T-rotation movements involve performing a standard push-up, then rotating into a side plank position while holding one bar. This combination challenges multiple muscle groups and improves coordination. Resistance Band Integration Adding resistance bands to push-up bar exercises increases the challenge throughout the entire range of motion. Anchor the band behind you and loop it over your back, or use bands attached to the bars themselves. This variation provides accommodating resistance, meaning the exercise becomes more challenging as you push up—matching your strength curve more closely than bodyweight alone. Maximising Your Push-Up Bar Training Consistency and progressive overload remain the keys to seeing results from push-up bar training. Start with 2-3 sets of 8-12 repetitions and gradually increase volume as your strength improves. Track your progress by recording the number of sets, repetitions, and any variations you perform. This documentation helps you identify when to increase difficulty and ensures continuous improvement. Consider your push-up bar training as part of a balanced fitness routine rather than a complete workout solution. Combine these exercises with pulling movements, lower body training, and cardiovascular exercise for optimal results. The benefits of push-up bars extend beyond just stronger chest muscles. Regular training improves shoulder stability, core strength, and overall functional upper body power that translates to daily activities and other sports. Quality equipment makes a significant difference in your training experience and results. Investing in well-constructed push-up bars ensures safety, durability, and optimal performance throughout your fitness journey. Remember that mastering push-up bar technique takes time and practice. Focus on perfect form with easier variations before progressing to more challenging exercises. This patient approach builds a strong foundation and reduces injury risk while maximising long-term results.
Hex vs Round Dumbbells: UK Home Gym Buying Guide

News

Hex vs Round Dumbbells: UK Home Gym Buying Guide

by Saqlain Irshad on Sep 15 2025
  Choosing the right dumbbells can make or break your home gym setup. Whether you're kitting out a spare bedroom in Manchester or creating a garden gym in Surrey, the decision between hex and round dumbbells will impact your workouts for years to come. Dumbbells remain one of the most versatile pieces of fitness equipment you can own. They build strength, improve coordination, and offer endless exercise possibilities. However, with countless options flooding the UK fitness market, selecting between hex and round designs often leaves gym enthusiasts scratching their heads. The shape of your dumbbells affects everything from storage space to exercise variety. Round dumbbells offer traditional functionality, while hex dumbbells promise enhanced stability and safety. Understanding these differences will help you make an informed choice that aligns with your fitness goals, budget, and available space. This comprehensive guide examines both dumbbell types, comparing their strengths and weaknesses to help you decide which suits your UK home gym best. What are Hex Dumbbells? Hex dumbbells feature six flat sides that prevent rolling when placed on the floor. These weights typically consist of cast iron or steel cores covered in rubber coating, though some manufacturers offer urethane or neoprene alternatives. The hexagonal design emerged from practical gym needs. Commercial fitness centres required weights that wouldn't roll across floors, creating safety hazards or disrupting other gym users. This innovation quickly spread to home fitness enthusiasts across the UK who appreciated the added stability. Modern hex dumbbells often come with contoured handles designed for comfortable gripping during extended workout sessions. Many UK suppliers offer these weights in complete sets, making them attractive options for those establishing comprehensive home gyms. Advantages of Hex Dumbbells Superior Stability The flat sides eliminate rolling, making hex dumbbells perfect for exercises requiring floor placement. You can safely transition between movements without chasing weights across your workout space. Enhanced Safety Hex dumbbells won't roll away during rest periods or when changing weights. This feature proves particularly valuable in smaller UK homes where space constraints mean weights might be placed near furniture or walls. Efficient Storage Many hex dumbbell sets come with purpose-built racks that maximise storage efficiency. These compact systems work well in British homes where space comes at a premium. Durability The rubber coating protects both the weights and your flooring. This matters significantly for UK homeowners concerned about damage to wooden floors or fitted carpets. Disadvantages of Hex Dumbbells Exercise Limitations The flat sides can interfere with certain movements, particularly exercises requiring the weights to roll along your body or change position smoothly during the movement. Bulk Factor Hex dumbbells often appear bulkier than round alternatives, which can affect exercise comfort and range of motion during certain movements. Higher Cost Quality hex dumbbell sets, particularly rubber hex dumbbell sets with racks, typically command higher prices than basic round alternatives. What are Round Dumbbells? Round dumbbells represent the traditional dumbbell design, featuring cylindrical weights that can rotate freely. These weights come in various materials, from basic cast iron to rubber-coated options popular in UK home gyms. The circular design offers unrestricted movement during exercises, making them ideal for dynamic movements and exercises requiring smooth weight transitions. Many fitness professionals prefer round dumbbells for their versatility and natural feel during workouts. Round dumbbells often cost less than hex alternatives, making them attractive options for budget-conscious UK consumers starting their fitness journey. However, this lower cost sometimes comes with trade-offs in convenience and safety features. Advantages of Round Dumbbells Exercise Versatility Round dumbbells excel at exercises requiring smooth weight movement. They work particularly well for exercises like chest flies, where the weights need to move in natural arcs without obstruction. Natural Movement The circular design feels more natural during many exercises, allowing for smooth transitions and comfortable positioning throughout your range of motion. Cost Effectiveness Basic round dumbbells typically cost less than hex alternatives, making them appealing options for UK fitness enthusiasts working within tight budgets. Compact Design Round dumbbells often feature more compact designs than hex alternatives, which can benefit those working with limited space in British homes. Disadvantages of Round Dumbbells Rolling Issues Round dumbbells roll when placed on floors, creating potential safety hazards and inconvenience during workouts. This becomes particularly problematic in smaller UK homes where space is limited. Storage Challenges Without specialized racks, round dumbbells can be difficult to store efficiently. They may roll around storage areas, creating organization challenges. Stability Concerns The rolling tendency makes round dumbbells less suitable for exercises requiring weights to remain stationary between sets or during transitions. Hex vs Round Dumbbells: A Detailed Comparison When evaluating hex dumbbell vs round dumbbell, several key factors come into play: Stability Hex dumbbells win decisively in stability comparisons. The flat sides ensure weights remain exactly where you place them, eliminating the frustration of chasing rolling weights across your exercise space. Round dumbbells require careful placement and often need weight stands or racks to prevent rolling. This limitation becomes particularly apparent during circuit training or exercises requiring frequent weight changes. For UK home gym users, stability matters significantly due to space constraints. Hex dumbbells allow you to use every available inch of your workout area without worrying about weights rolling into furniture or walls. Versatility Round dumbbells offer superior versatility for exercise variety. Their smooth, circular design accommodates exercises requiring natural weight movement without obstruction from flat surfaces. Hex dumbbells excel at exercises involving floor work or stationary positioning but may feel awkward during dynamic movements requiring smooth weight transitions. Consider your preferred exercise types when evaluating versatility. If you focus primarily on basic strength training movements, hex dumbbells provide everything you need. However, if you enjoy varied workout routines including dynamic movements, round dumbbells might serve you better. Safety Safety comparisons favour hex dumbbells in most home gym scenarios. The anti-roll design prevents weights from creating trip hazards or rolling into valuable furniture common in UK homes. Round dumbbells require additional safety considerations, including proper storage solutions and careful placement during workouts. However, their smooth design eliminates sharp edges that might catch on clothing or skin during certain movements. The rubber coating available on many hex dumbbell sets provides additional safety benefits by protecting floors and reducing noise—important considerations for UK homeowners concerned about disturbing neighbours in terraced or semi-detached properties. Storage Storage efficiency strongly favours hex dumbbells, particularly when purchased as complete sets with dedicated racks. A hex dumbbell set with rack provides organized, space-efficient storage that works well in British homes where space is precious. Hex dumbbell set racks often feature compact designs that fit against walls or in corners, maximizing your available floor space for actual exercise. Many UK suppliers offer full hex dumbbell sets with storage solutions designed specifically for home use. Round dumbbells require separate storage solutions, which may include wall-mounted racks or floor stands. While these options exist, they often prove less space-efficient than integrated hex dumbbell storage systems. Cost Cost comparisons reveal interesting nuances between hex and round dumbbell options. Basic round dumbbells typically cost less initially, making them attractive for budget-conscious UK consumers. However, hex dumbbell sets often provide better long-term value when you factor in storage solutions and safety features. A complete rubber hex dumbbell set with rack might cost more upfront but eliminates the need for separate storage purchases. Consider total ownership costs when making your decision. Hex dumbbell sets offer integrated solutions that may prove more economical than purchasing round dumbbells plus separate storage and safety accessories. Which Dumbbell is Right for You? Consider Your Fitness Goals Your exercise preferences should guide your dumbbell choice. If you focus on basic strength training movements like bicep curls, shoulder presses, and squats, hex dumbbells provide excellent stability and safety. Those who enjoy varied workout routines including dynamic movements, circuit training, or exercises requiring smooth weight transitions might prefer round dumbbells' unrestricted movement. Beginners often benefit from hex dumbbells' stability and safety features, while experienced users might appreciate round dumbbells' versatility for advanced exercise variations. Consider Your Workout Space UK home gym spaces often determine the best dumbbell choice. Smaller spaces benefit significantly from hex dumbbells' anti-roll design and integrated storage solutions. If you're working with a dedicated gym room where weights won't interfere with daily life, round dumbbells' rolling tendency becomes less problematic. However, most UK home gyms occupy shared spaces where stability matters. Ceiling height, flooring type, and proximity to neighbours also influence your choice. Rubber hex dumbbell sets reduce noise and protect flooring—important considerations in many British homes. Consider Your Budget Budget considerations extend beyond initial purchase price. While round dumbbells often cost less initially, remember to factor in storage solutions and potential flooring protection. Hex dumbbell sets with racks offer comprehensive solutions that might prove more economical long-term. Many UK suppliers offer financing options for complete hex dumbbell sets, making higher-quality options more accessible. Consider your purchase as an investment in your health and home. Quality hex dumbbell sets often last decades, making their higher initial cost reasonable when spread over years of use. Making the Right Choice for Your UK Home Gym Both hex and round dumbbells offer distinct advantages depending on your specific needs and circumstances. Hex dumbbells excel in stability, safety, and storage efficiency—factors that matter significantly in typical UK home environments. Round dumbbells provide superior exercise versatility and often cost less initially, making them attractive options for experienced users with dedicated workout spaces and specific exercise requirements. For most UK home gym enthusiasts, hex dumbbells represent the better choice. Their combination of safety, stability, and storage efficiency addresses the common challenges faced in British homes where space is limited and safety matters. Consider investing in a quality rubber hex dumbbell set with rack from a reputable UK supplier. This comprehensive solution provides everything needed for effective strength training while addressing storage and safety concerns common in home gym environments. Your dumbbell choice will influence your workout experience for years to come. Choose based on your specific needs, space constraints, and long-term fitness goals rather than price alone.  
7 Best Hex Dumbbell Sets for Home Gyms 2025 UK | Complete Guide

News

7 Best Hex Dumbbell Sets for Home Gyms 2025 UK | Complete Guide

by Saqlain Irshad on Sep 15 2025
Building a proper home gym requires the right equipment, and hex dumbbells remain one of the most versatile and effective tools for strength training. With their unique six-sided design preventing rolling and space-saving benefits, hex dumbbell sets have become essential for UK fitness enthusiasts looking to maximize their workout potential at home. Whether you're a beginner starting your fitness journey or an experienced lifter expanding your home setup, choosing the right hex dumbbell set can make all the difference. The market offers numerous options, from basic pairs to comprehensive sets with racks and benches, making the selection process both exciting and overwhelming. This comprehensive guide examines the seven best hex dumbbell sets available for UK home gyms in 2025. We'll explore everything from budget-friendly options to premium complete systems, helping you make an informed decision based on your specific needs, space constraints, and fitness goals. What Makes Hex Dumbbells Perfect for Home Gyms Hex dumbbells offer several advantages over traditional round dumbbells, making them particularly suitable for home use. The hexagonal shape prevents rolling, providing safety and convenience during workouts. This design feature becomes especially valuable in smaller spaces where equipment stability matters most. The rubber coating found on quality hex dumbbells protects both your floors and the weights themselves. This feature proves essential for UK homes, where protecting hardwood floors, tiles, or carpets from damage is a priority. Additionally, the coating reduces noise levels during workouts, making early morning or late evening sessions more neighbour-friendly. Most hex dumbbell sets come with textured handles that provide superior grip, even during sweaty workouts. This enhanced grip security reduces the risk of accidents and allows for more confident lifting, particularly important when working out alone at home. Essential Criteria for Choosing the Best Hex Dumbbell Sets When selecting a hex dumbbell set with rack for your home gym, several factors demand careful consideration. Build quality tops the list, as your investment should withstand years of regular use. Look for sets featuring solid steel construction with durable rubber coating that won't crack or peel over time. Weight range flexibility allows your equipment to grow with your fitness level. The best hex dumbbell sets offer incremental weight increases, enabling progressive overload training. Consider whether you need lighter weights for rehabilitation or higher weights for advanced strength training. Storage solutions significantly impact your home gym's functionality and appearance. A well-designed hex dumbbell set rack keeps weights organized, easily accessible, and off the floor. Three-tier vertical racks maximize storage efficiency in compact spaces, while horizontal racks work better for larger areas. Space requirements vary dramatically between different hex dumbbell sets. Measure your available area carefully, considering both storage space and workout space. Remember that you'll need clearance around the rack for safe weight selection and replacement during exercises. Top 7 Hex Dumbbell Sets for UK Home Gyms in 2025 1. SharkPowerGear Hex Dumbbell Set with 3-Tier Tree Rack The SharkPowerGear hex dumbbell set stands out as an excellent choice for UK home gym enthusiasts seeking quality and value. This versatile system offers multiple configuration options, from rack-only purchases to complete sets including dumbbells and optional benches. Pros: Anti-roll hex design with durable rubber coating Space-saving 3-tier vertical storage rack Customizable weight options (2kg-10kg range) Sweat-resistant textured handles Heavy-duty steel frame construction Optional bench integration Competitive UK pricing Cons: Limited to lighter weight ranges Assembly required for rack setup Rubber coating may show scuff marks over time This set excels for beginners to intermediate users focusing on toning, endurance training, and general fitness. The compact design suits smaller UK homes while providing room for progression. 2. York Fitness Neo Hex Dumbbell Set York Fitness brings decades of experience to their Neo hex dumbbell range, offering a premium option for serious home gym enthusiasts. This British brand combines traditional craftsmanship with modern design principles. Pros: Established UK brand with proven reliability Wide weight range options available Professional-grade construction Excellent grip texture and balance Comprehensive warranty coverage Cons: Higher price point than competitors Rack sold separately in most configurations Limited availability during peak seasons The York Neo series targets users prioritizing build quality and brand reputation over budget considerations. 3. PowerBlock Sport 24 Hex Dumbbell System PowerBlock's innovative approach combines hex dumbbell functionality with adjustable weight technology. This system maximizes space efficiency while providing extensive weight range flexibility. Pros: Adjustable weight system saves space Quick weight changes during workouts Expandable to higher weights Compact storage footprint Durable construction materials Cons: Significantly higher initial investment Learning curve for weight adjustment mechanism Limited availability in some UK regions This system suits advanced users willing to invest in premium, space-saving technology. 4. Mirafit Rubber Hex Dumbbell Set Mirafit offers a balanced combination of quality and affordability in their rubber hex dumbbell set. This UK-based company focuses on providing gym-quality equipment for home users. Pros: Competitive pricing for UK market Quality rubber coating with good durability Multiple set configurations available Good customer service and support Fast UK delivery options Cons: Basic rack design lacks premium features Handle texture could be more aggressive Limited weight increment options This set appeals to budget-conscious buyers seeking reliable performance without premium pricing. 5. Technogym My Wellness Hex Dumbbell Collection Technogym brings commercial gym quality to the home environment with their premium hex dumbbell collection. This Italian brand represents the luxury end of the home fitness market. Pros: Commercial-grade build quality Exceptional aesthetics and finish Professional weight accuracy Extensive weight range options Premium brand reputation Cons: Very high price point Rack system sold separately at additional cost Overkill for casual home users This collection targets affluent fitness enthusiasts who prioritize premium quality and brand prestige. 6. Capital Sports Hex Dumbbell Set Capital Sports provides a mid-range option combining decent quality with reasonable pricing. Their hex dumbbell sets offer good value for UK home gym builders on moderate budgets. Pros: Reasonable pricing for quality offered Decent rubber coating durability Multiple weight and rack options Good availability in UK market Acceptable build quality standards Cons: Not the most premium materials Basic rack design and functionality Customer service can be inconsistent This brand suits users seeking middle-ground solutions between budget and premium options. 7. Fitness Superstore Pro Hex Dumbbell Range Fitness Superstore's own-brand hex dumbbells offer excellent value for money while maintaining decent quality standards. This UK retailer focuses on providing affordable solutions for home fitness enthusiasts. Pros: Very competitive UK pricing Good rubber coating for price point Wide range of weight options Local UK customer support Frequent promotional offers Cons: Basic construction materials Simple rack designs May not withstand heavy commercial use This range works well for budget-conscious buyers prioritizing value over premium features. Comparison Table: Best Hex Dumbbell Sets 2025 Brand Price Range Weight Options Rack Included Best For UK Availability SharkPowerGear £30-£150 2kg-10kg 3-tier tree Beginners-Intermediate Excellent York Neo £200-£500 1kg-25kg Optional All levels Good PowerBlock £300-£800 Adjustable up to 22kg Built-in Advanced users Limited Mirafit £100-£300 1kg-20kg Basic rack Budget-conscious Excellent Technogym £500-£1500 1kg-50kg Premium options Luxury market Good Capital Sports £150-£400 2kg-25kg Standard rack Mid-range users Good Fitness Superstore £80-£250 1kg-15kg Basic options Budget buyers Excellent How to Incorporate Hex Dumbbells into Your Workout Routine Creating an effective workout routine with your new hex dumbbell set requires understanding both the versatility of the equipment and proper exercise progression. Hex dumbbells excel at compound movements that work multiple muscle groups simultaneously, making them perfect for efficient home workouts. Upper Body Development Start with basic movements like chest presses, rows, and shoulder presses. The stable hex design allows for floor-based exercises that would be challenging with round dumbbells. Chest flies, tricep extensions, and bicep curls all benefit from the secure grip and anti-roll properties of hex weights. Progress from basic movements to more complex exercises like Turkish get-ups, single-arm rows, and combination movements. The balanced design of hex dumbbells makes them excellent for unilateral training, helping address muscle imbalances and improve functional strength. Lower Body Training Hex dumbbells prove surprisingly effective for lower body workouts. Goblet squats, lunges, and Romanian deadlifts all work excellently with hex weights. The stable base allows for floor-based exercises like single-leg hip thrusts and calf raises. Full-Body Circuits Design circuit training sessions combining upper body, lower body, and core movements. The quick weight changes possible with organized rack systems make circuit training more efficient and enjoyable. Consider investing in a full hex dumbbell set to maximize the variety and progression in your circuits. Maintenance and Care Tips for Hex Dumbbell Sets Proper maintenance extends the lifespan of your hex dumbbell set and ensures safe, effective workouts. Regular cleaning prevents rubber degradation and maintains grip quality. Use mild soap solutions rather than harsh chemicals that might damage rubber coatings. Storage Best Practices Always return weights to their designated rack positions after use. This practice prevents damage from dropping and maintains the organization of your home gym. Ensure your storage area maintains stable temperatures and humidity levels to prevent rubber deterioration. Handle Care Clean handles regularly with antibacterial wipes, especially after intense sweating sessions. Check periodically for signs of wear or loosening, particularly where handles meet weight heads. Address any issues promptly to prevent safety hazards. Rack Maintenance Inspect rack joints and welds regularly for signs of stress or damage. Tighten any loose bolts or connections as part of routine maintenance. Keep the rack area clean and free from debris that might interfere with weight placement or removal. Rubber Coating Protection Avoid dropping weights unnecessarily, even though rubber coating provides some protection. Store weights away from direct sunlight and extreme temperatures that might cause rubber to crack or become brittle. Consider gym mats under your hex dumbbell set rack to provide additional floor protection. Making the Right Investment for Your Home Gym Selecting the best hex dumbbell set for your UK home gym involves balancing multiple factors including budget, space, fitness goals, and quality expectations. The seven options presented offer solutions across all price ranges and user requirements. For beginners and intermediate users seeking excellent value, the SharkPowerGear hex dumbbell set with rack provides outstanding functionality at competitive pricing. The customizable options allow you to start small and expand as your fitness level progresses. Advanced users and those prioritizing premium quality should consider the York Neo or Technogym options, despite higher initial investments. These sets offer superior build quality and extended weight ranges that support long-term fitness progression. Budget-conscious buyers will find excellent value in the Mirafit and Fitness Superstore ranges, which provide reliable performance without premium pricing. These options prove that effective home gym equipment doesn't require enormous investments. Remember that the best hex dumbbell set is the one you'll use consistently. Consider your workout preferences, available space, and realistic fitness goals when making your decision. A well-chosen set will provide years of effective workouts and support your health and fitness journey. Invest in quality within your budget, prioritize safety features, and choose a system that offers room for progression. Your home gym equipment represents an investment in your health and well-being, making careful selection crucial for long-term satisfaction and results.